Porthole replacement/upgrade project – by Dejan Radeka
This technical article about porthole replacement is adapted from several of my posts in the Forum about this topic.
With three different builders, and some 500 plus hulls built over a span of almost 40 years there are many variations in fit, finish and hardware found on the Sea Sprite 23. A good example is the set of portholes that came with your boat. Unless you have a late model Ryder built hull with the nice bronze portholes, you most likely have some variation of aluminum framed plexiglass fixed port, or perhaps a slightly better quality, yet non bronze, opening port. If they are the former, I’m sure they leak like a sieve and are cloudy and nasty looking, with corroded aluminum frames.
After contemplating this for several years I bit the bullet and decided to get some new portholes for Firefly. I wanted bronze. In my opinion it was the only option for the pretty Sprite.
For almost two years I searched eBay, consignment shops, etc for used ports. The main problems I found with used ports include:
1) They never have the trim rings, which make them essentially useless.
2) The condition is never very good
3) They’re always too big for the Sprite
4) They’re way overpriced.
I finally had enough of the searching. I bought new, bronze opening ports from NewFound Metals in Port Townsend, WA http://www.newfoundmetals.com)
I opted for their 3×10 bronze opening port. This is a bit smaller than the originals. The next size up was a 4×14 (the dimensions refer to glass size) but I was afraid that might look a bit “horsey” on the small weekender cabintrunk.
Luckily Newfound had two bronze 3×10’s in stock, albeit one was in their warehouse and one was going into their next shipment from their foundry (in Asia). After assuring me that I would receive them within 4 weeks I placed the order. I was a bit nervous; after all I had to do major surgery to the cabin and then cut new holes. Would I have to sail all summer with duct tape over the holes? They shipped one immediately and drop-shipped the other from Asia at no additional charge to me.
I also got their teak backing boards (to save time making them myself) plus the butyl tape and hardware.
The first part of the project is to fix the apertures in the cabintrunk. The original cutouts are too big, and also positioned a bit too high on the cabin trunk.
Old ports removed:
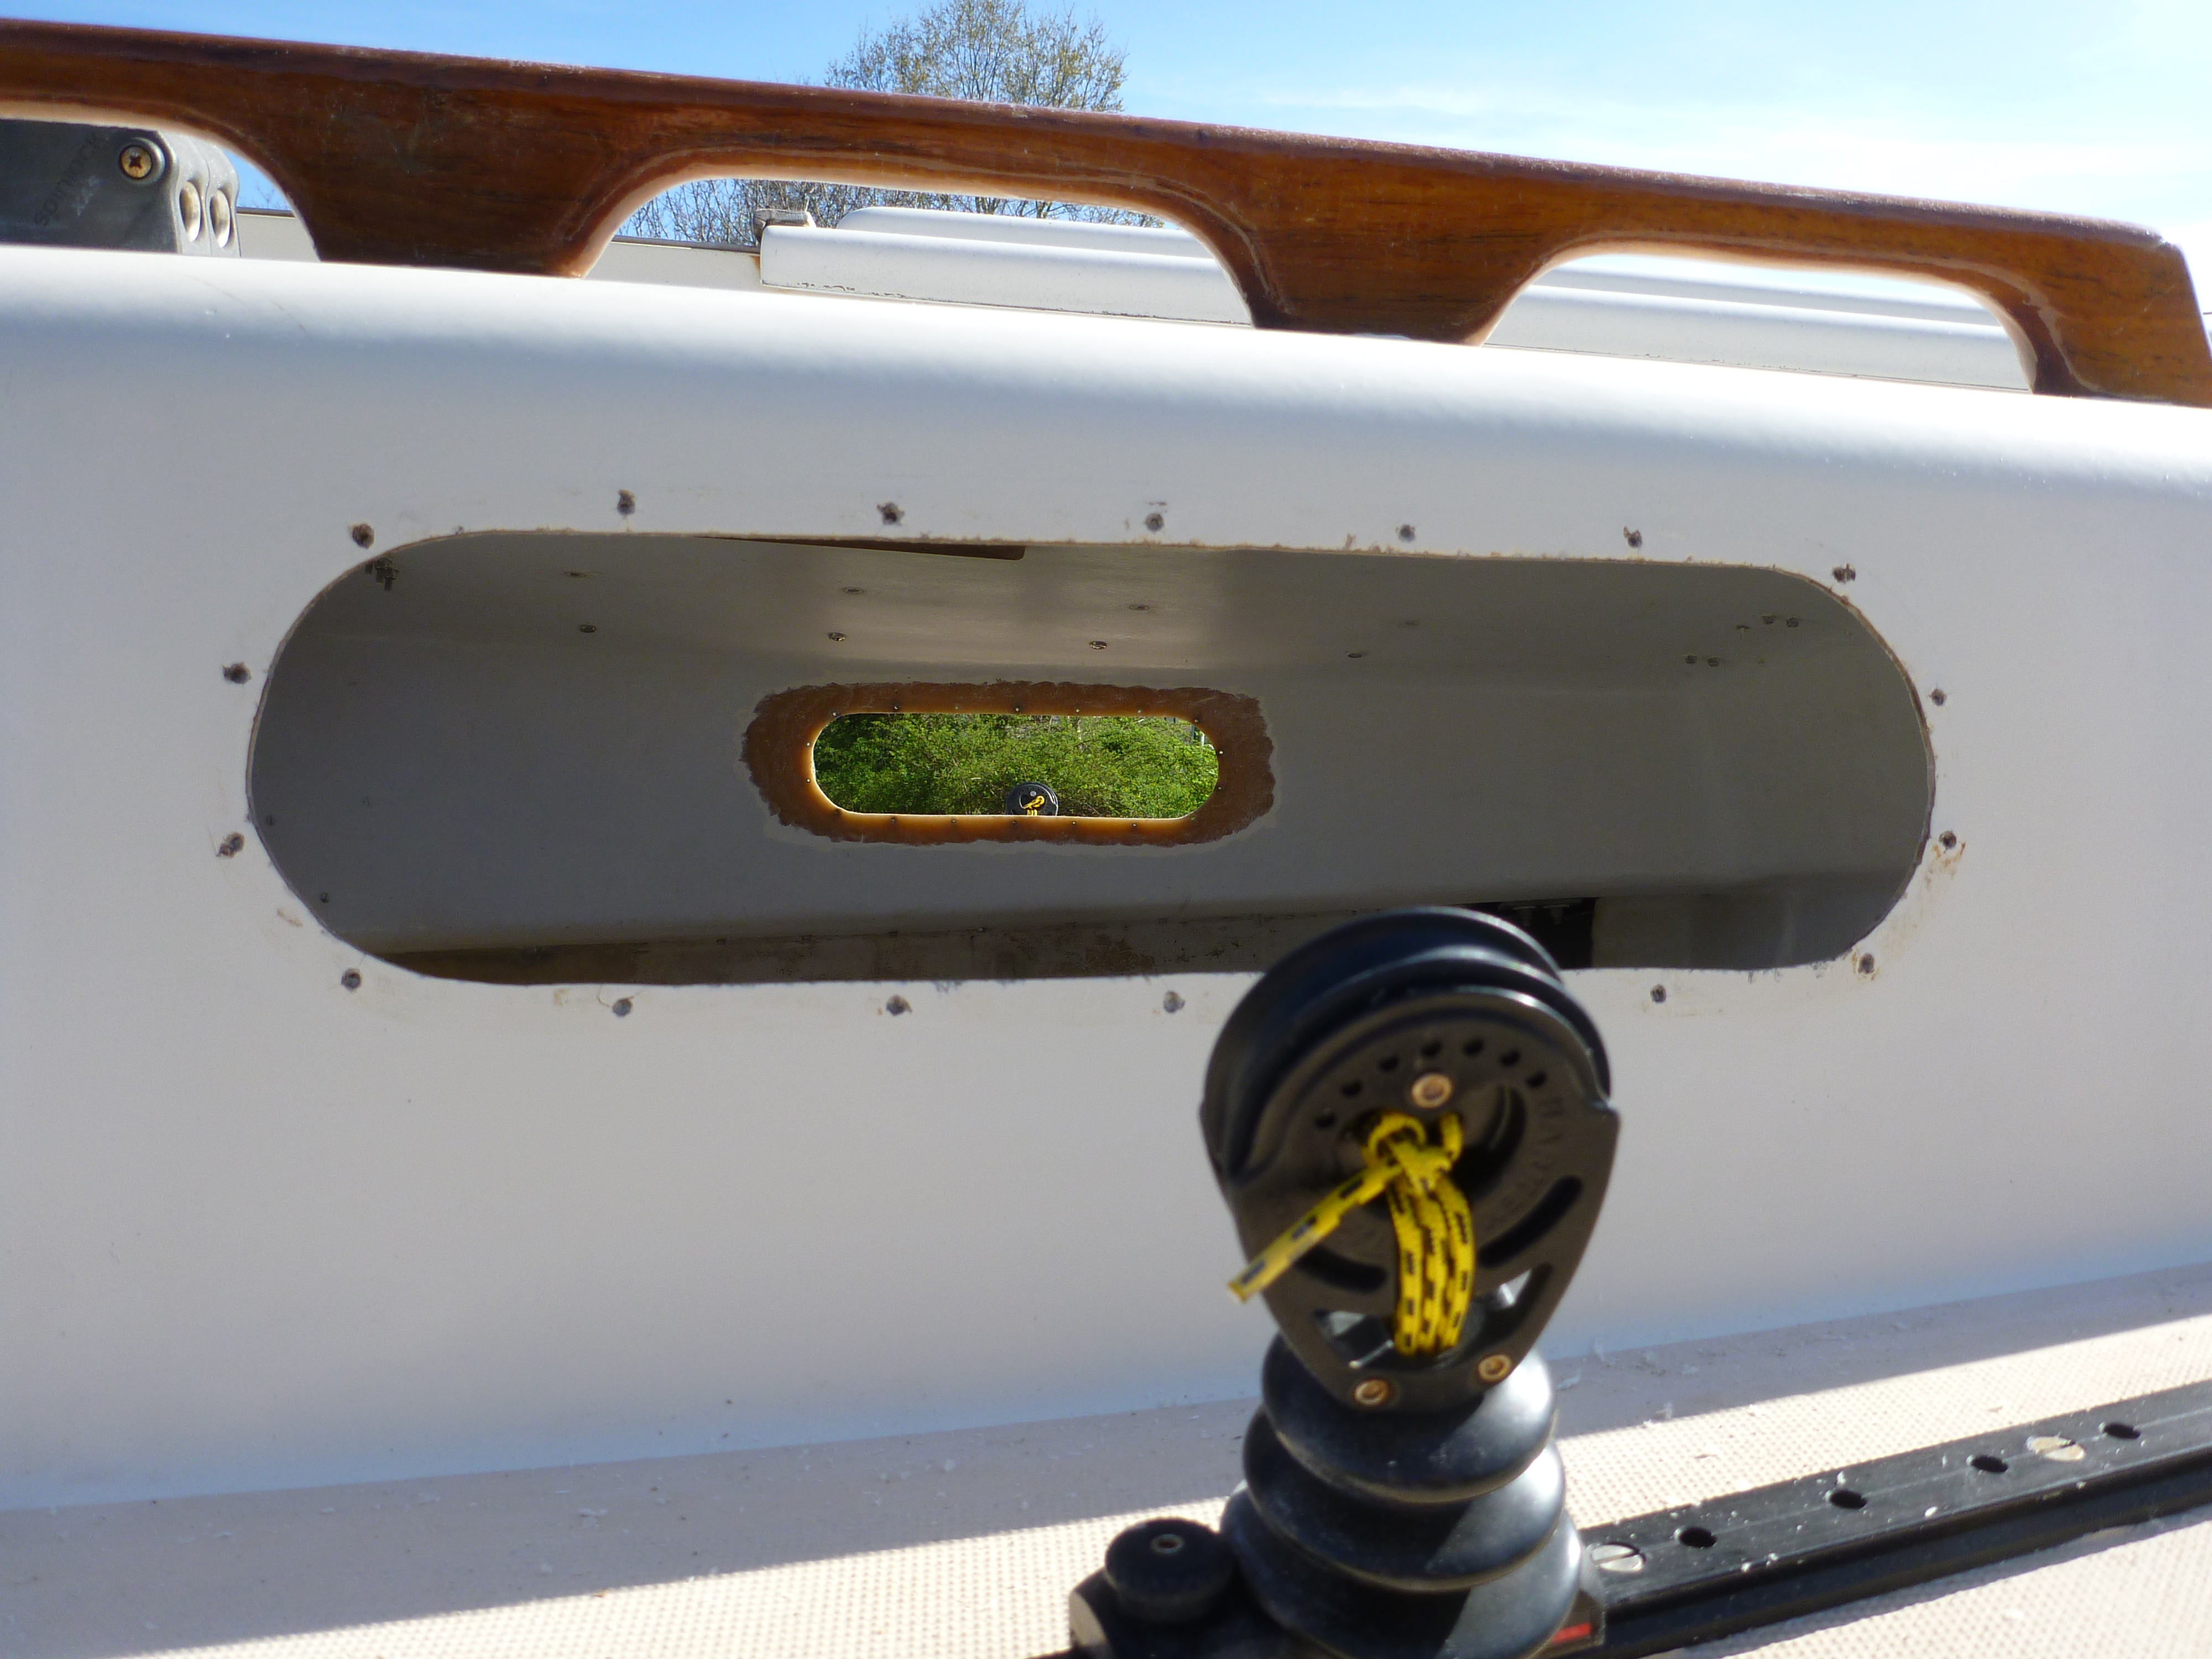
The next photo shows the grinding work INSIDE the cabin.. By making the mess inside, I have less finish/fairing work to do outside.
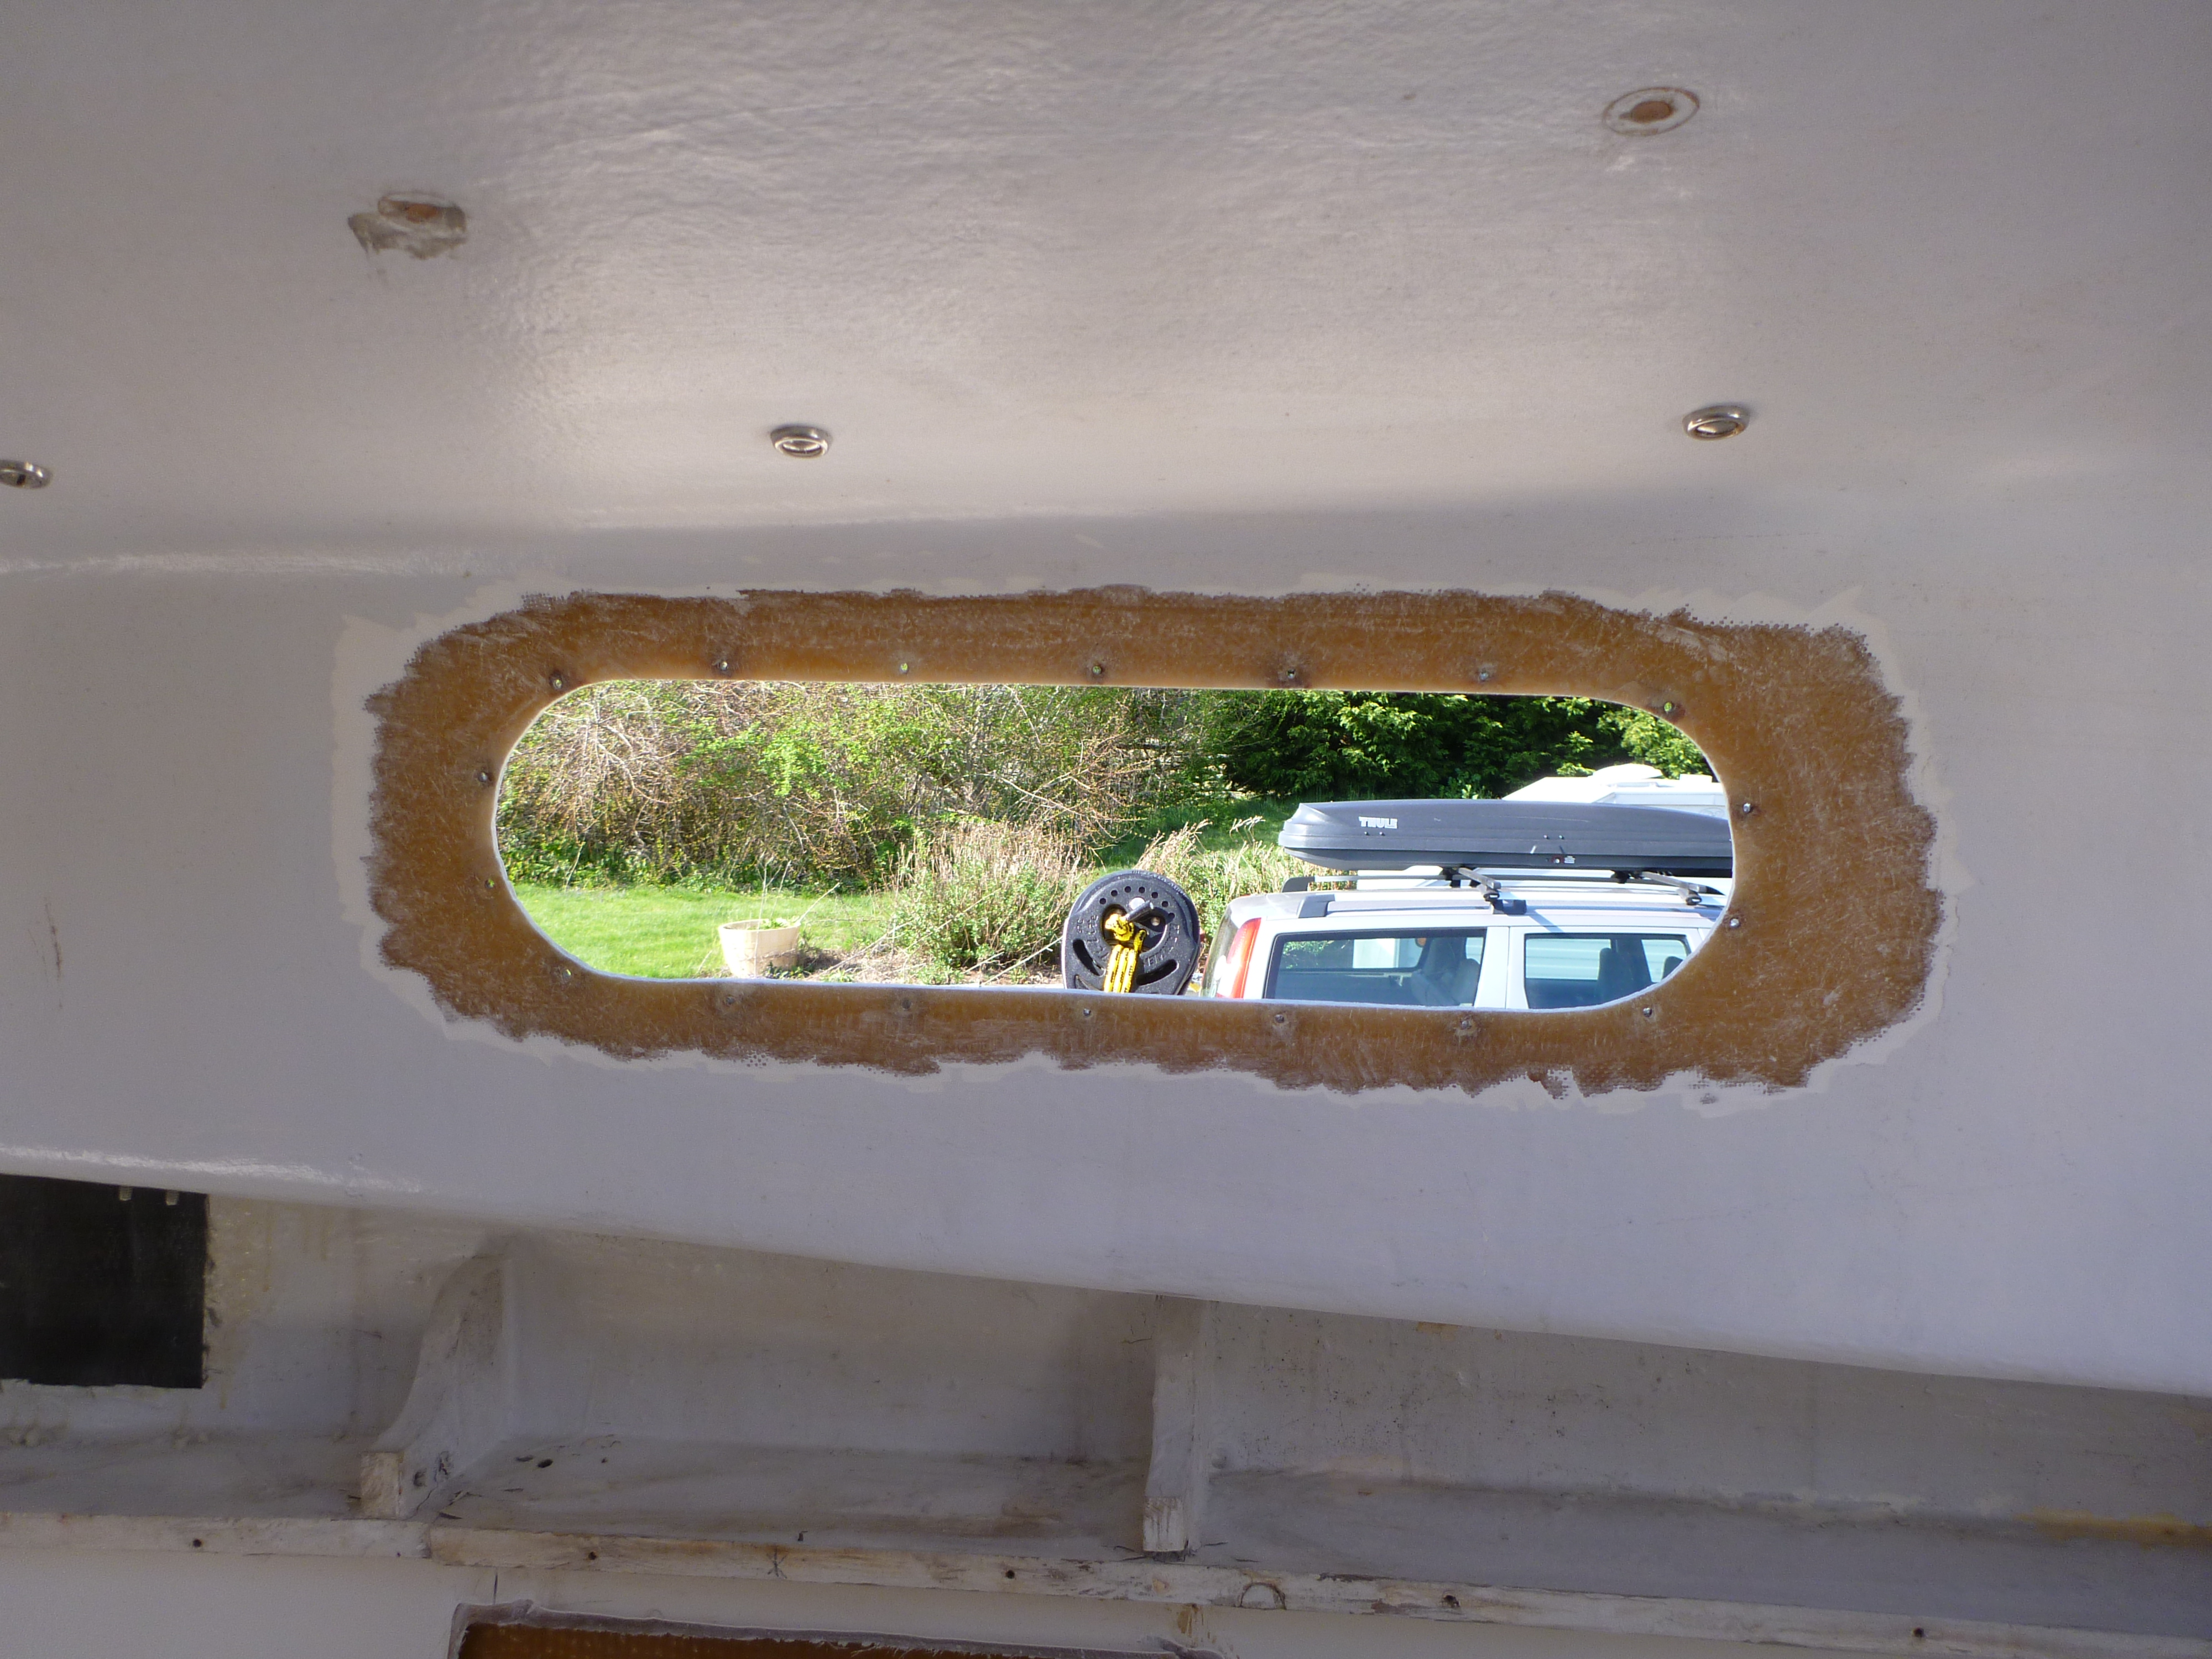
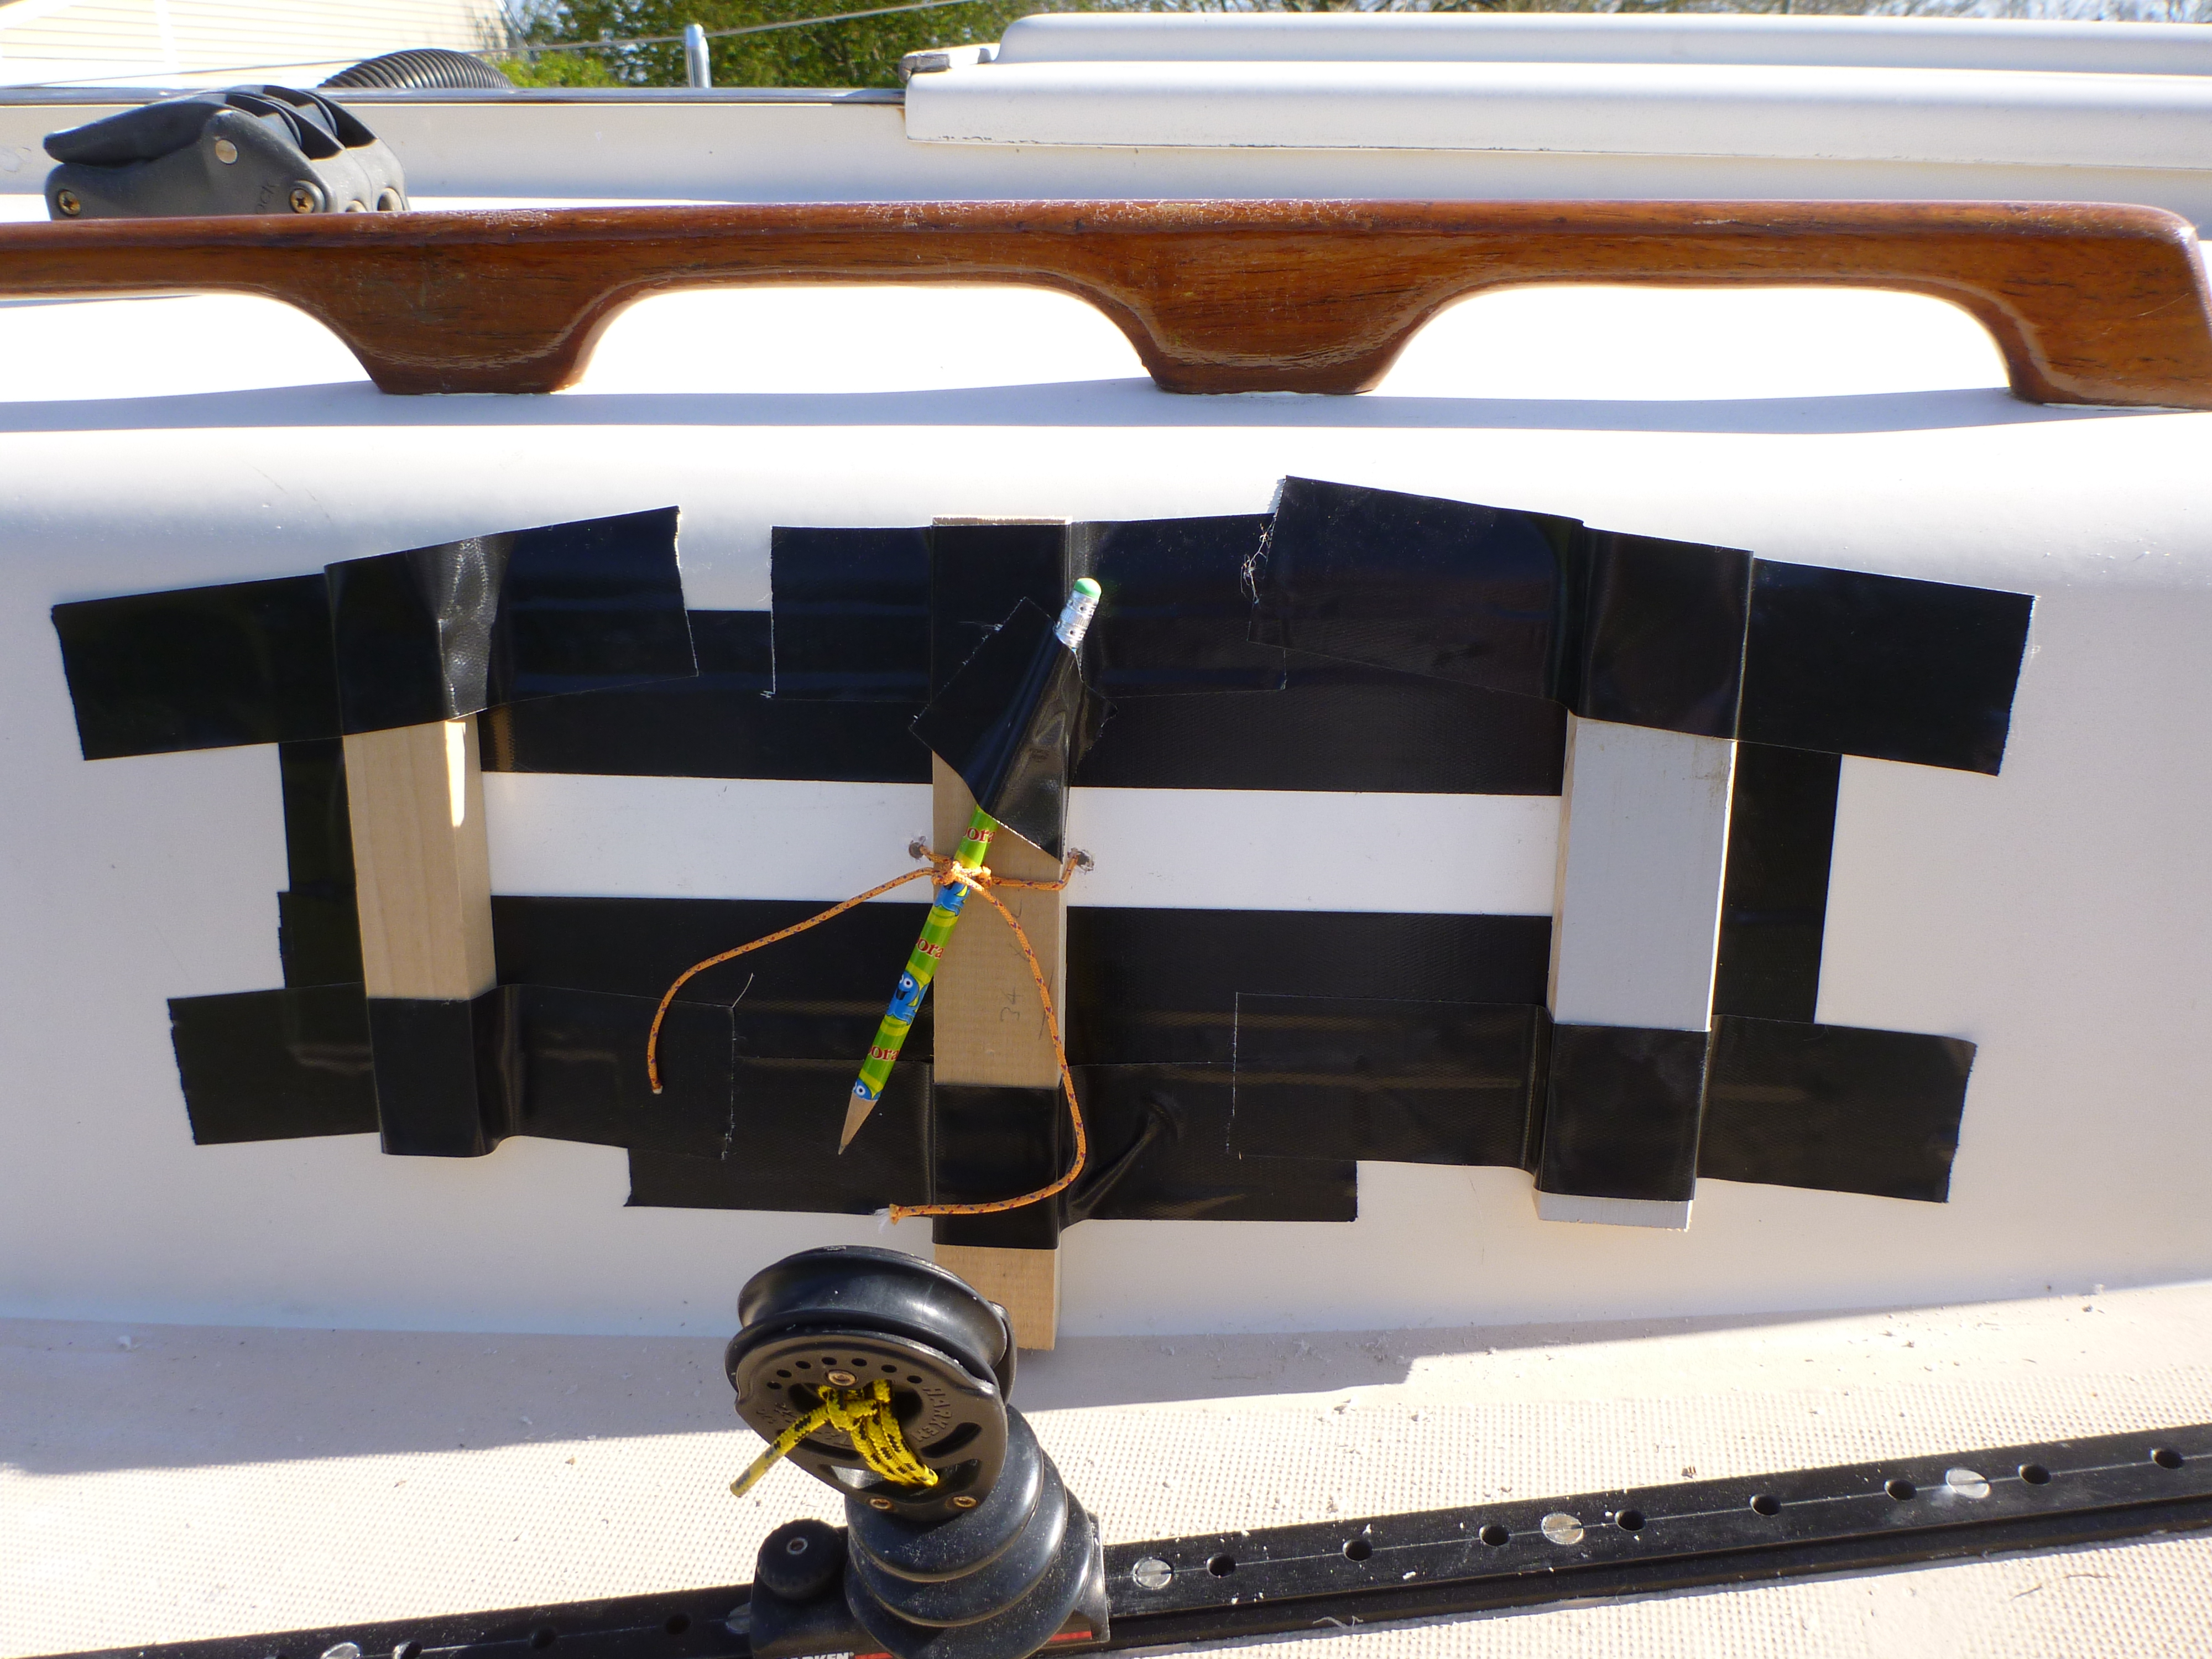
Next, prepare the aperture for the repair and make glass inserts. I recycled. I made inserts from scrap left over from cutting out the icebox and sink modules. You could also use G10, or layup your own inserts. Here I have duct – taped the outside of the aperture, to hold the insert. The three wood blocks are there because the cabin trunk is curved, and the insert will need to be forced against them to match the bend.
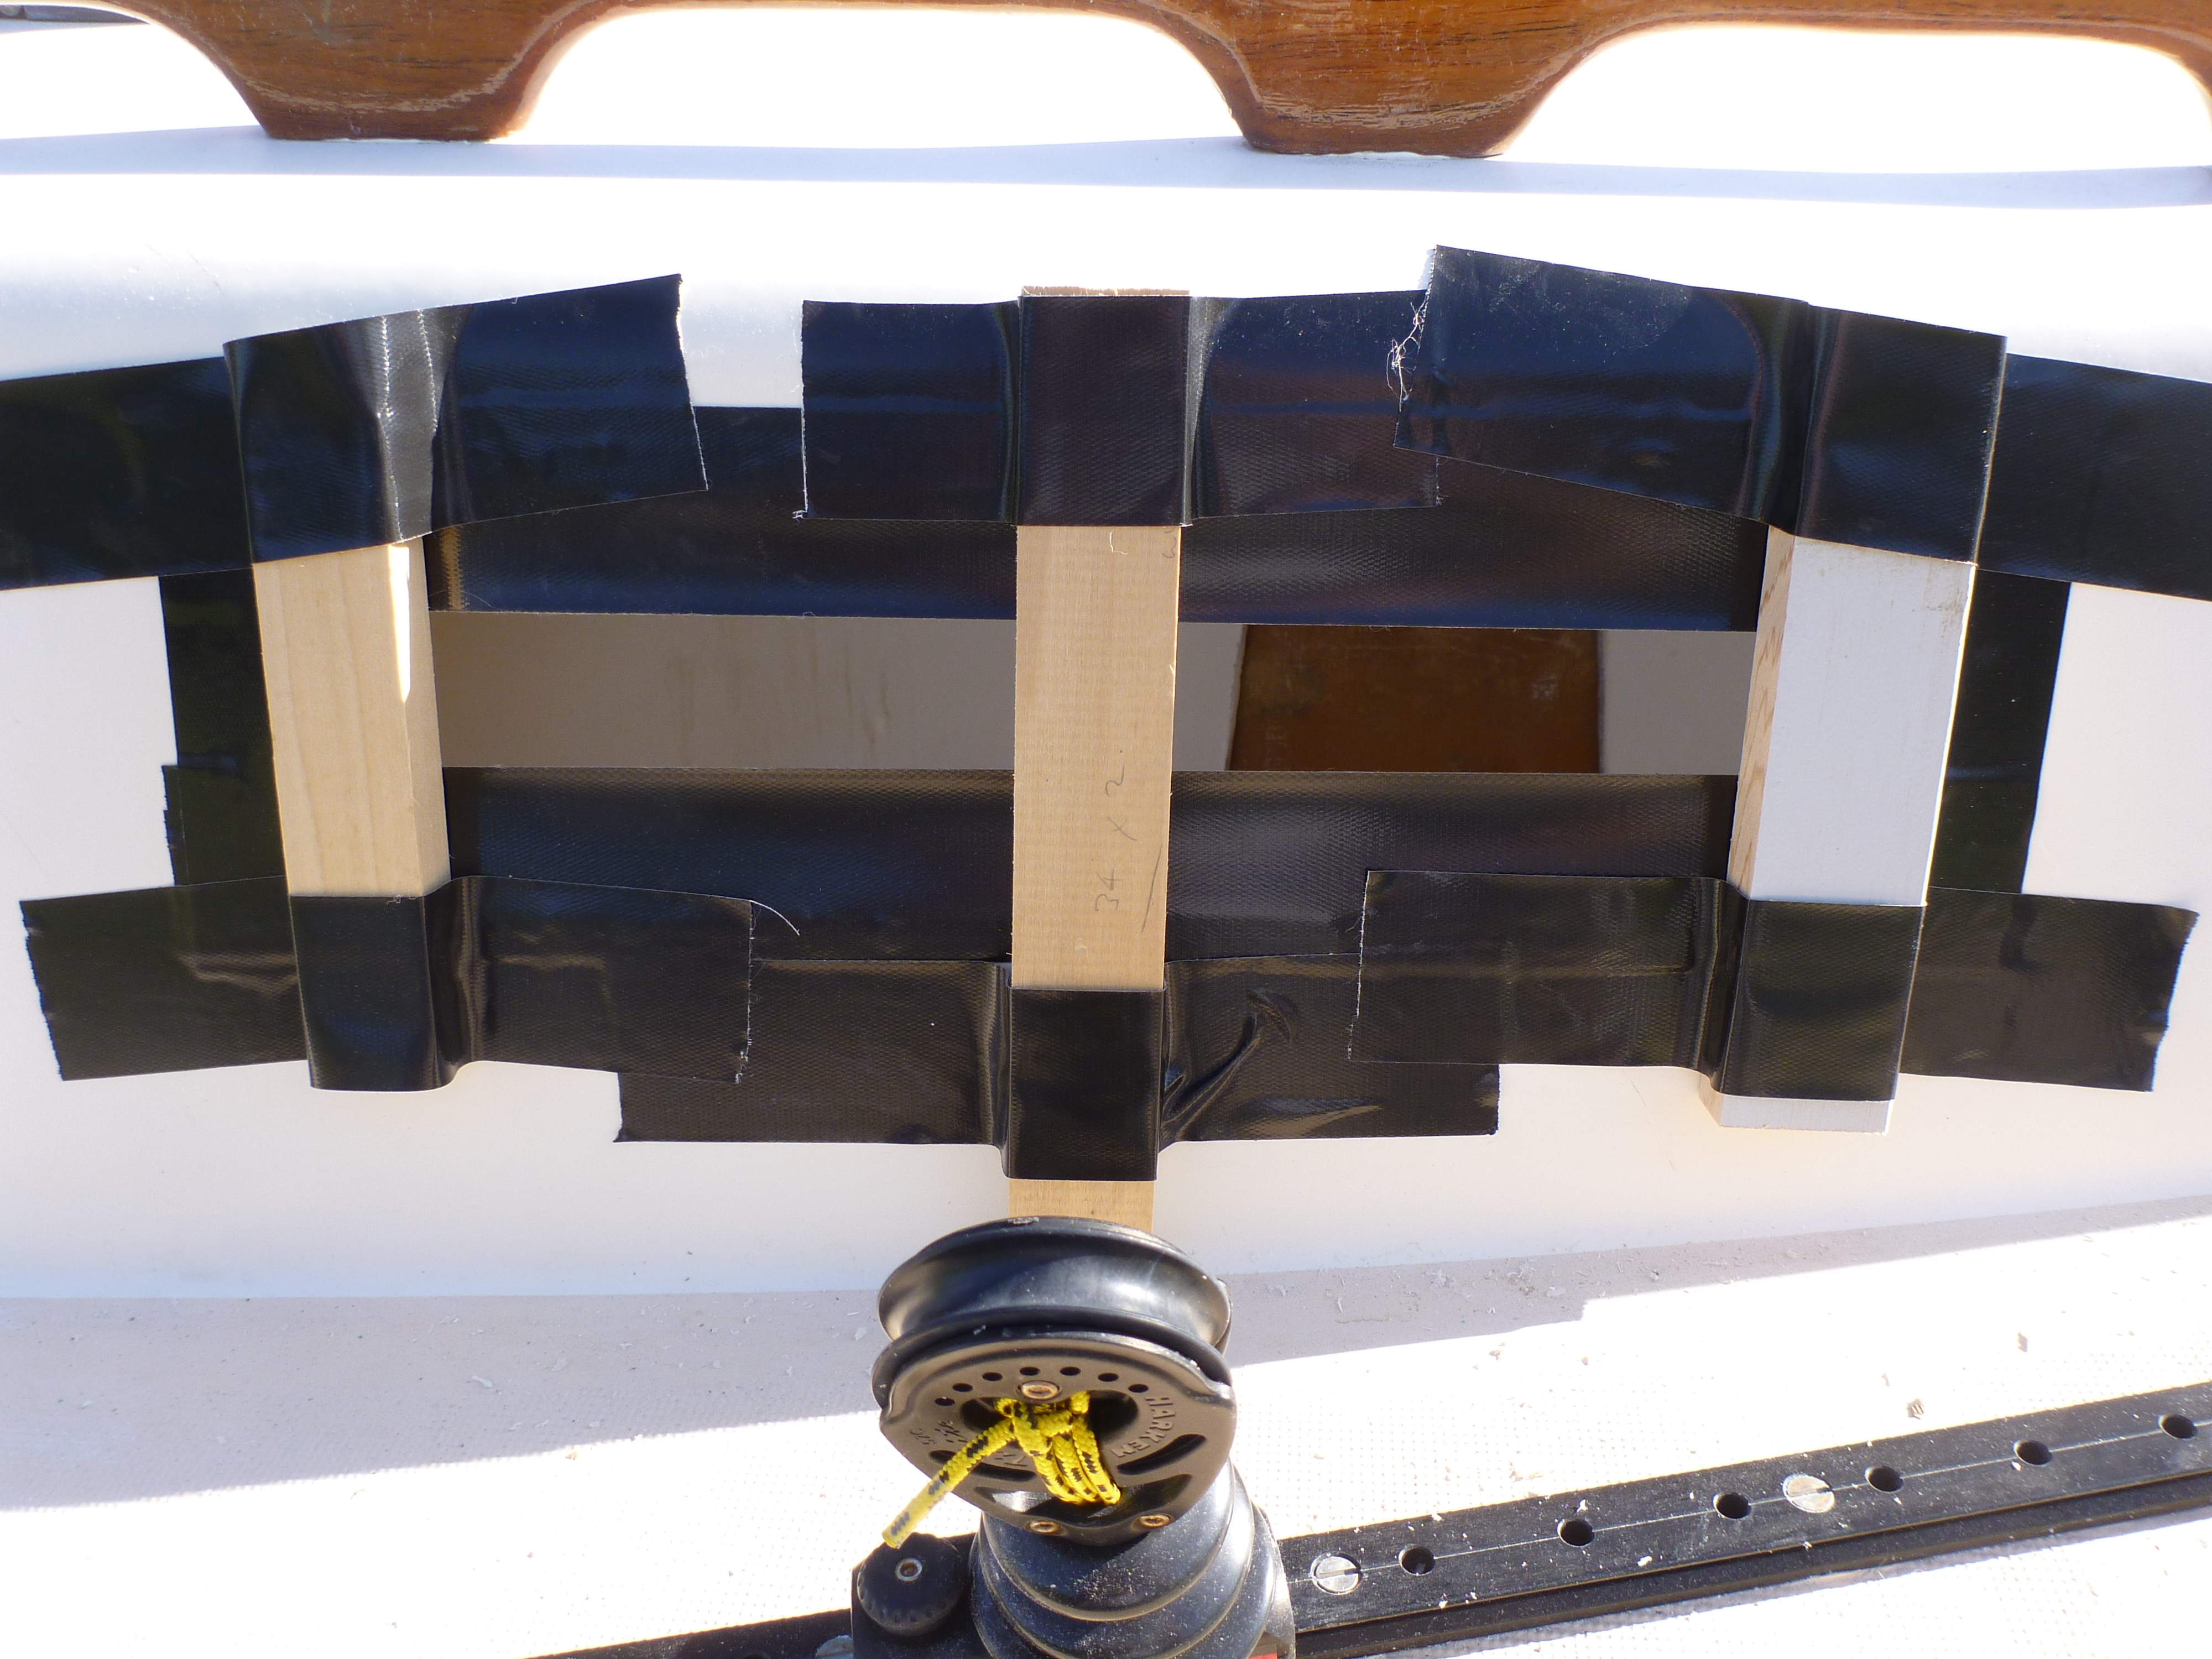
Place the inserts from inside the cabin. Note the piece of light line. I used the line to pull the insert against the center block to induce the curve.
Next, tighten the line from the outside, in tourniquet fashion, to bend the insert to match the curve of the cabin side, and tape off the tourniquet “stick.”.
Back inside the cabin, fill the gap using West System Six-10 adhesive. You do this with a standard caulk gun. This stuff is great, and so easy to use. You can also mix up your own batch of thickened epoxy, but I have found that on some of these smaller projects it is just so much easier, faster and neater to use the Six-10 cartridges.
Use a small plastic West spreader or putty knife to smooth out the epoxy while still wet, to keep the surface smooth for the glass layup that comes next.
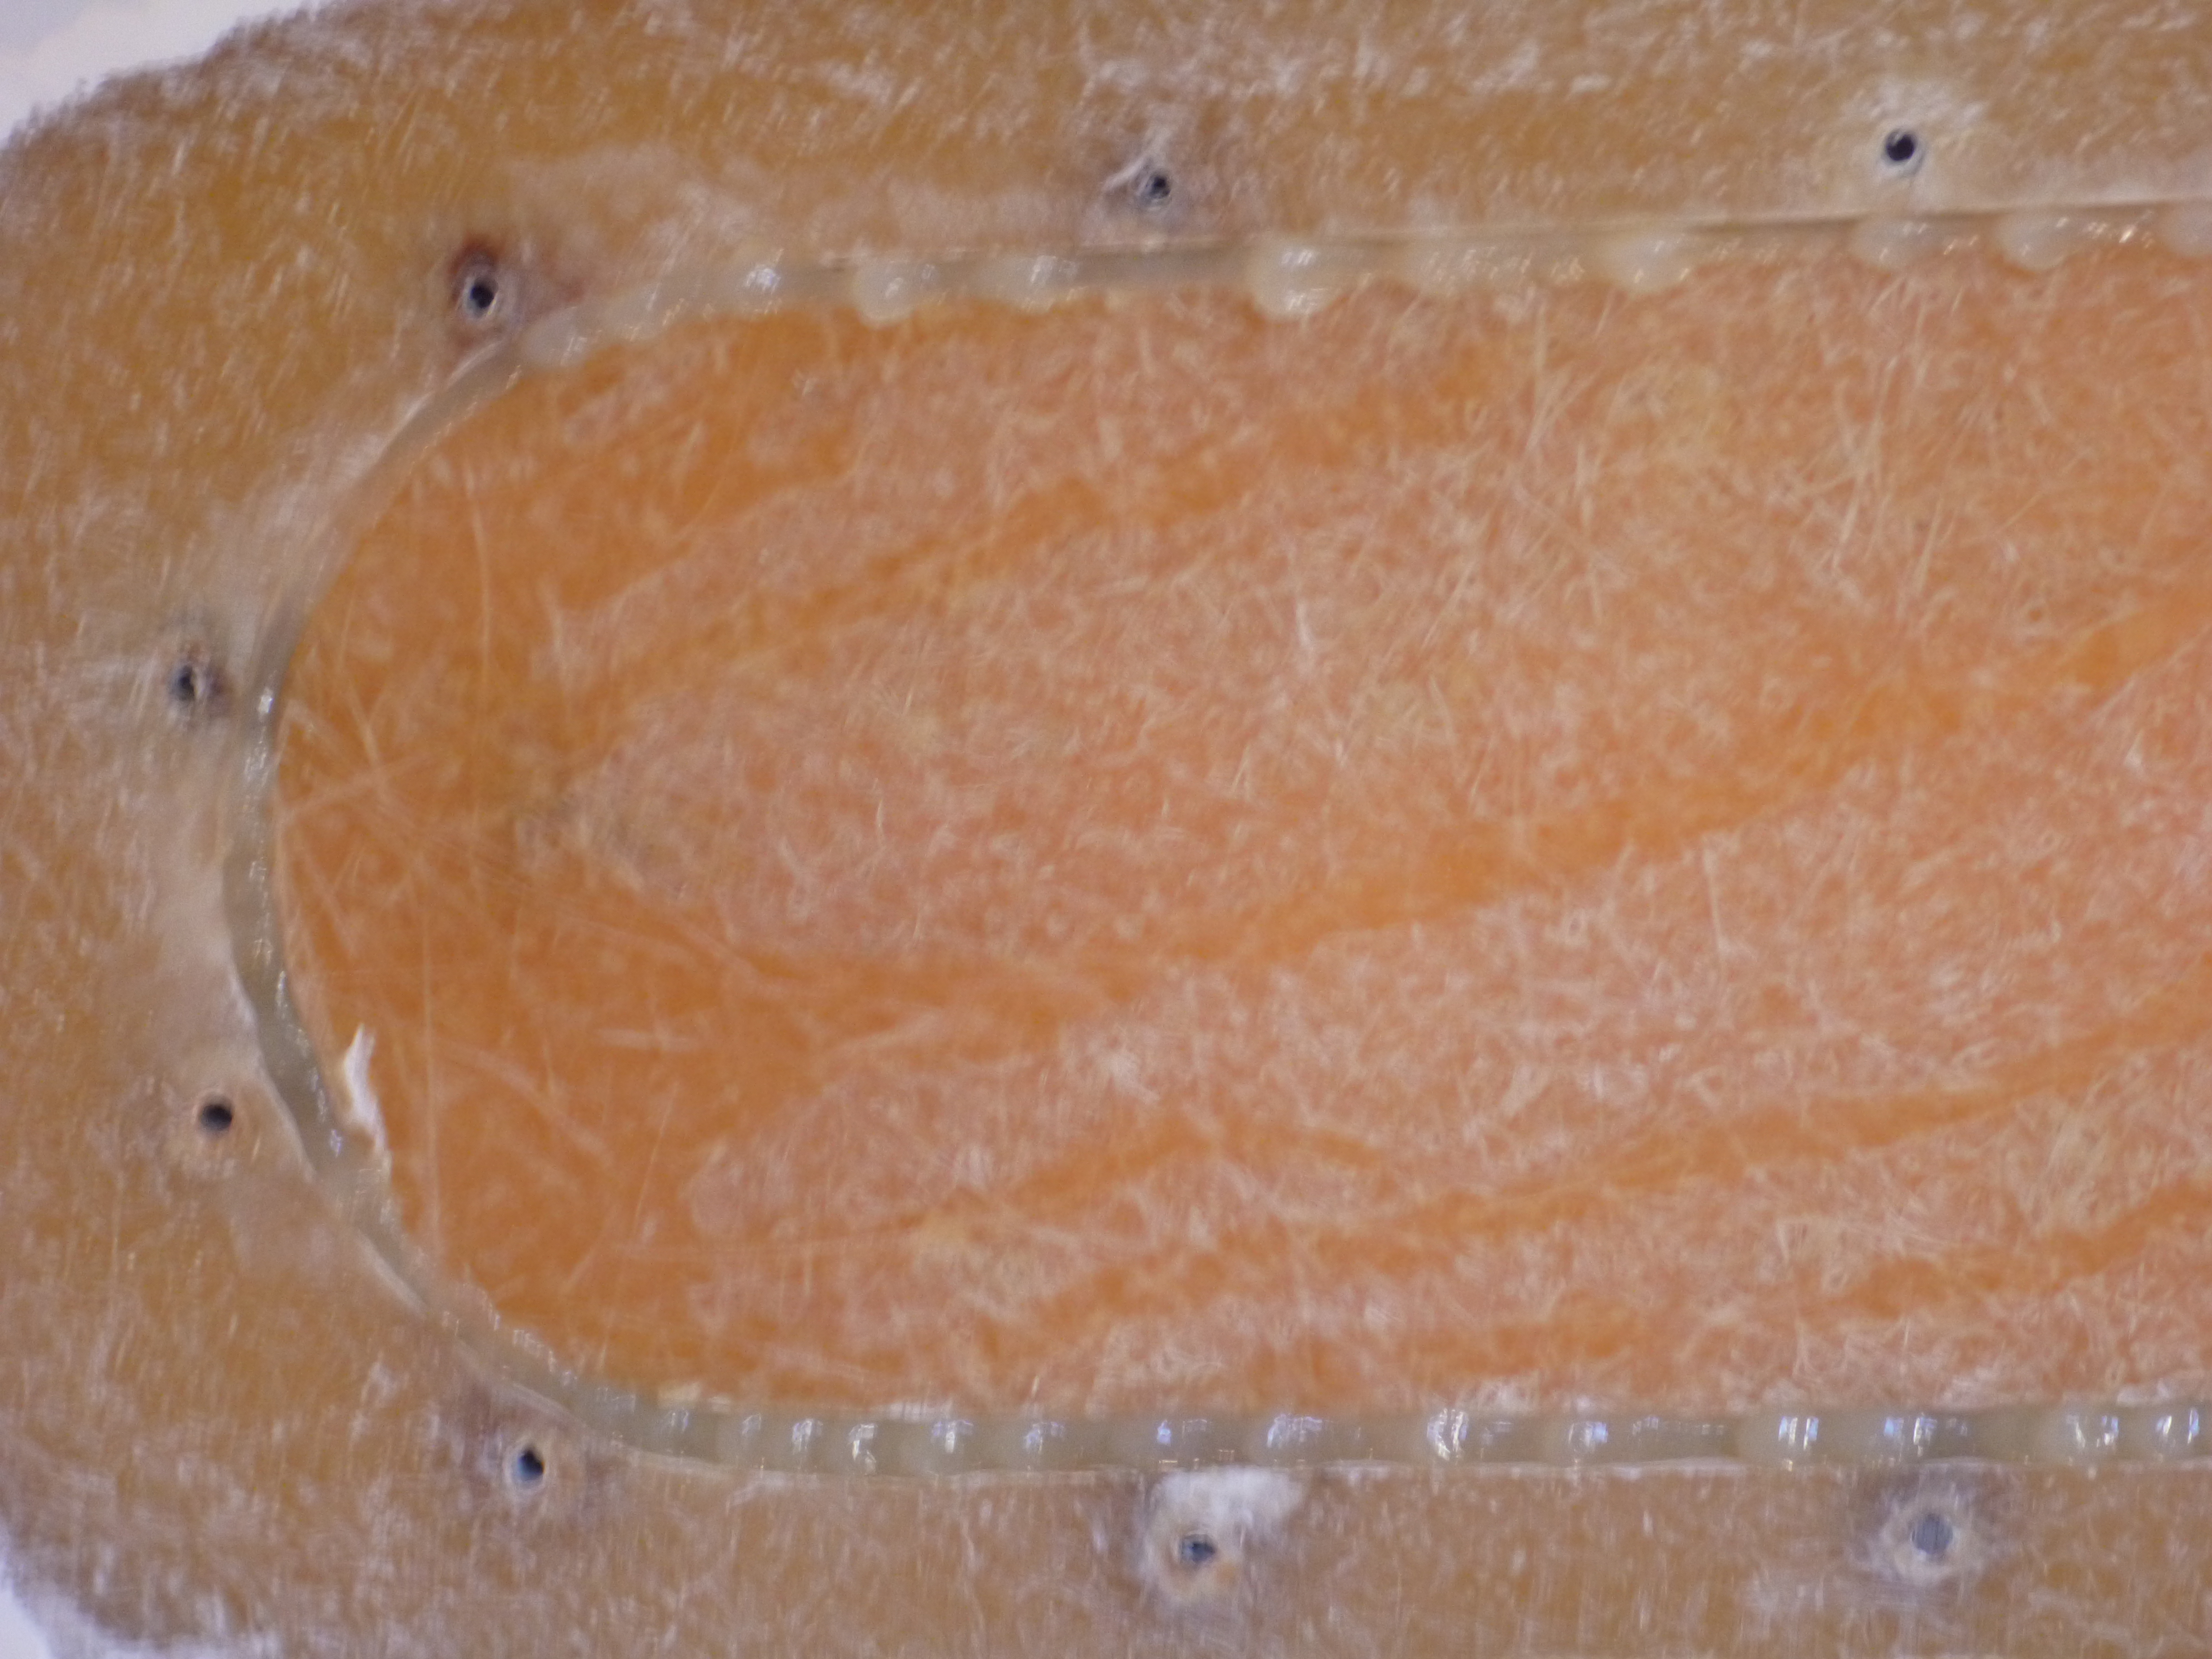
The last step is to layup the glass cloth. I did 3 layers of 6 oz glass. Go right over the tourniquet as it is sacrificial and will be cut out when you cut the new aperture. Try to layup as cleanly and neatly as possible so as to make the fairing and finishing easier later on. I pre-cut and numbered the pieces of cloth ahead of time.
Plan this out so that you do the layup in the same step as gluing in the inserts, while all the epoxy is still wet. There is no need to do this in two steps. It will all kick off together, and will save you a day of waiting to get to the next step!
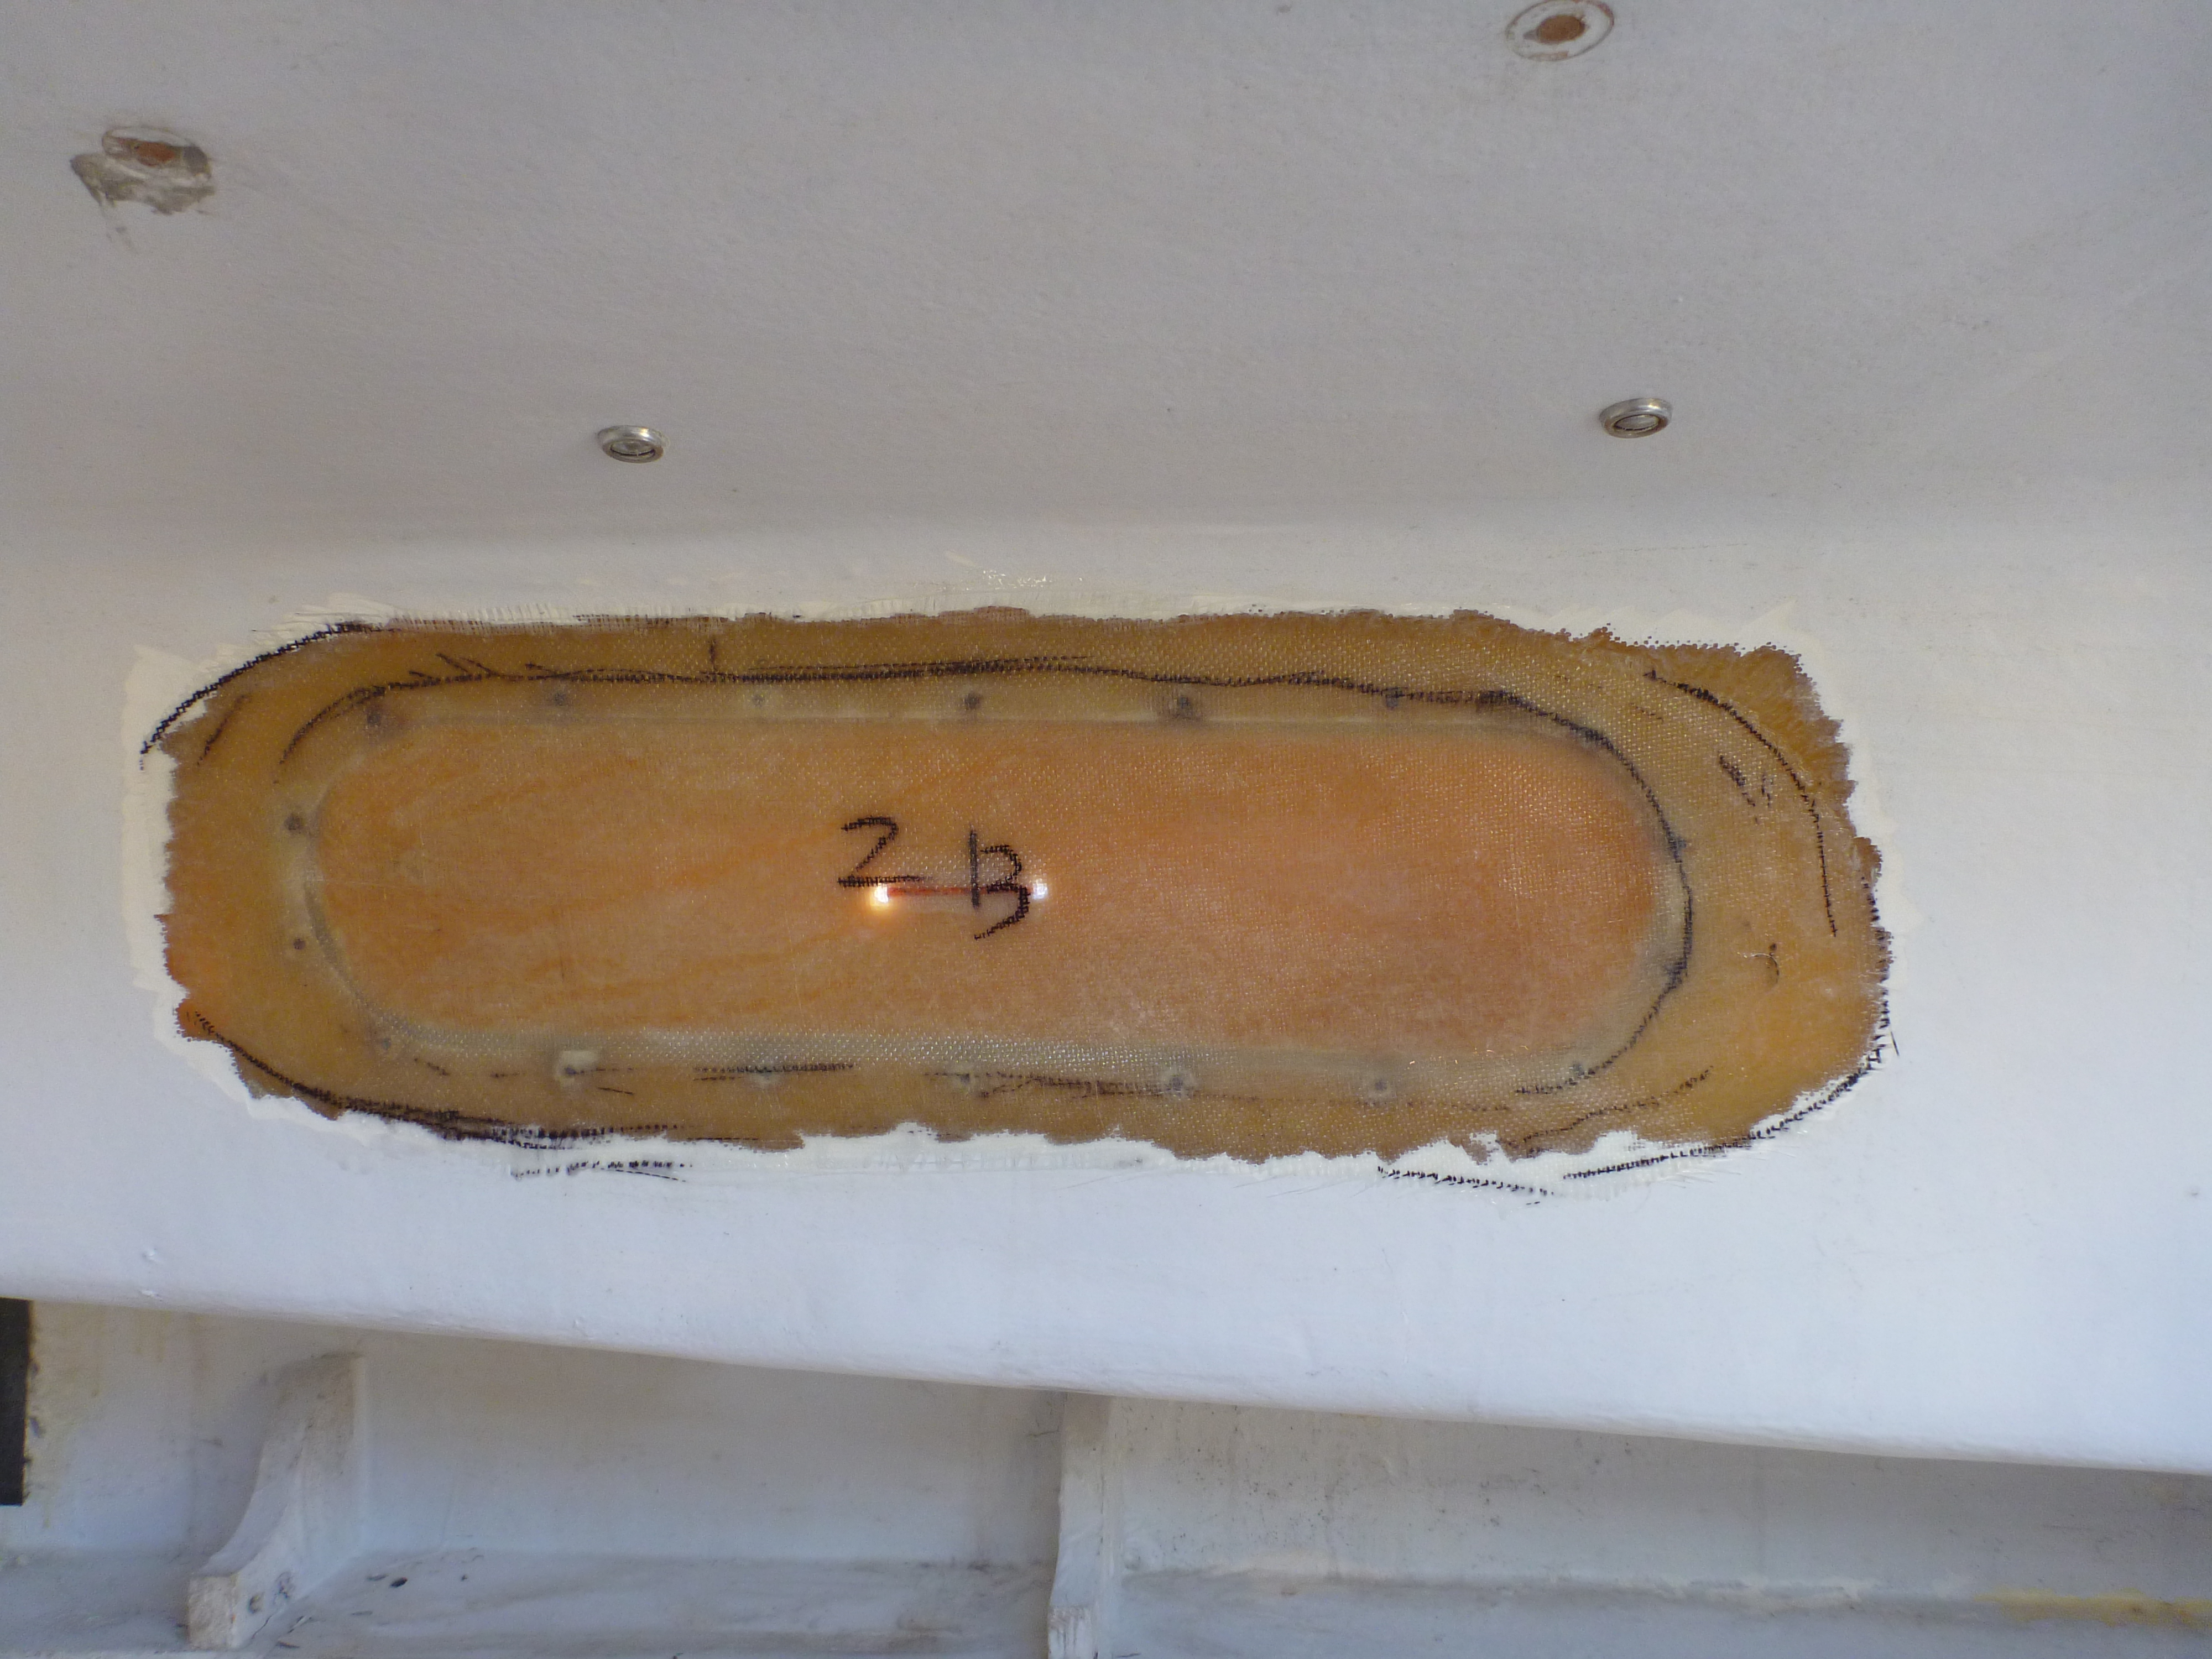
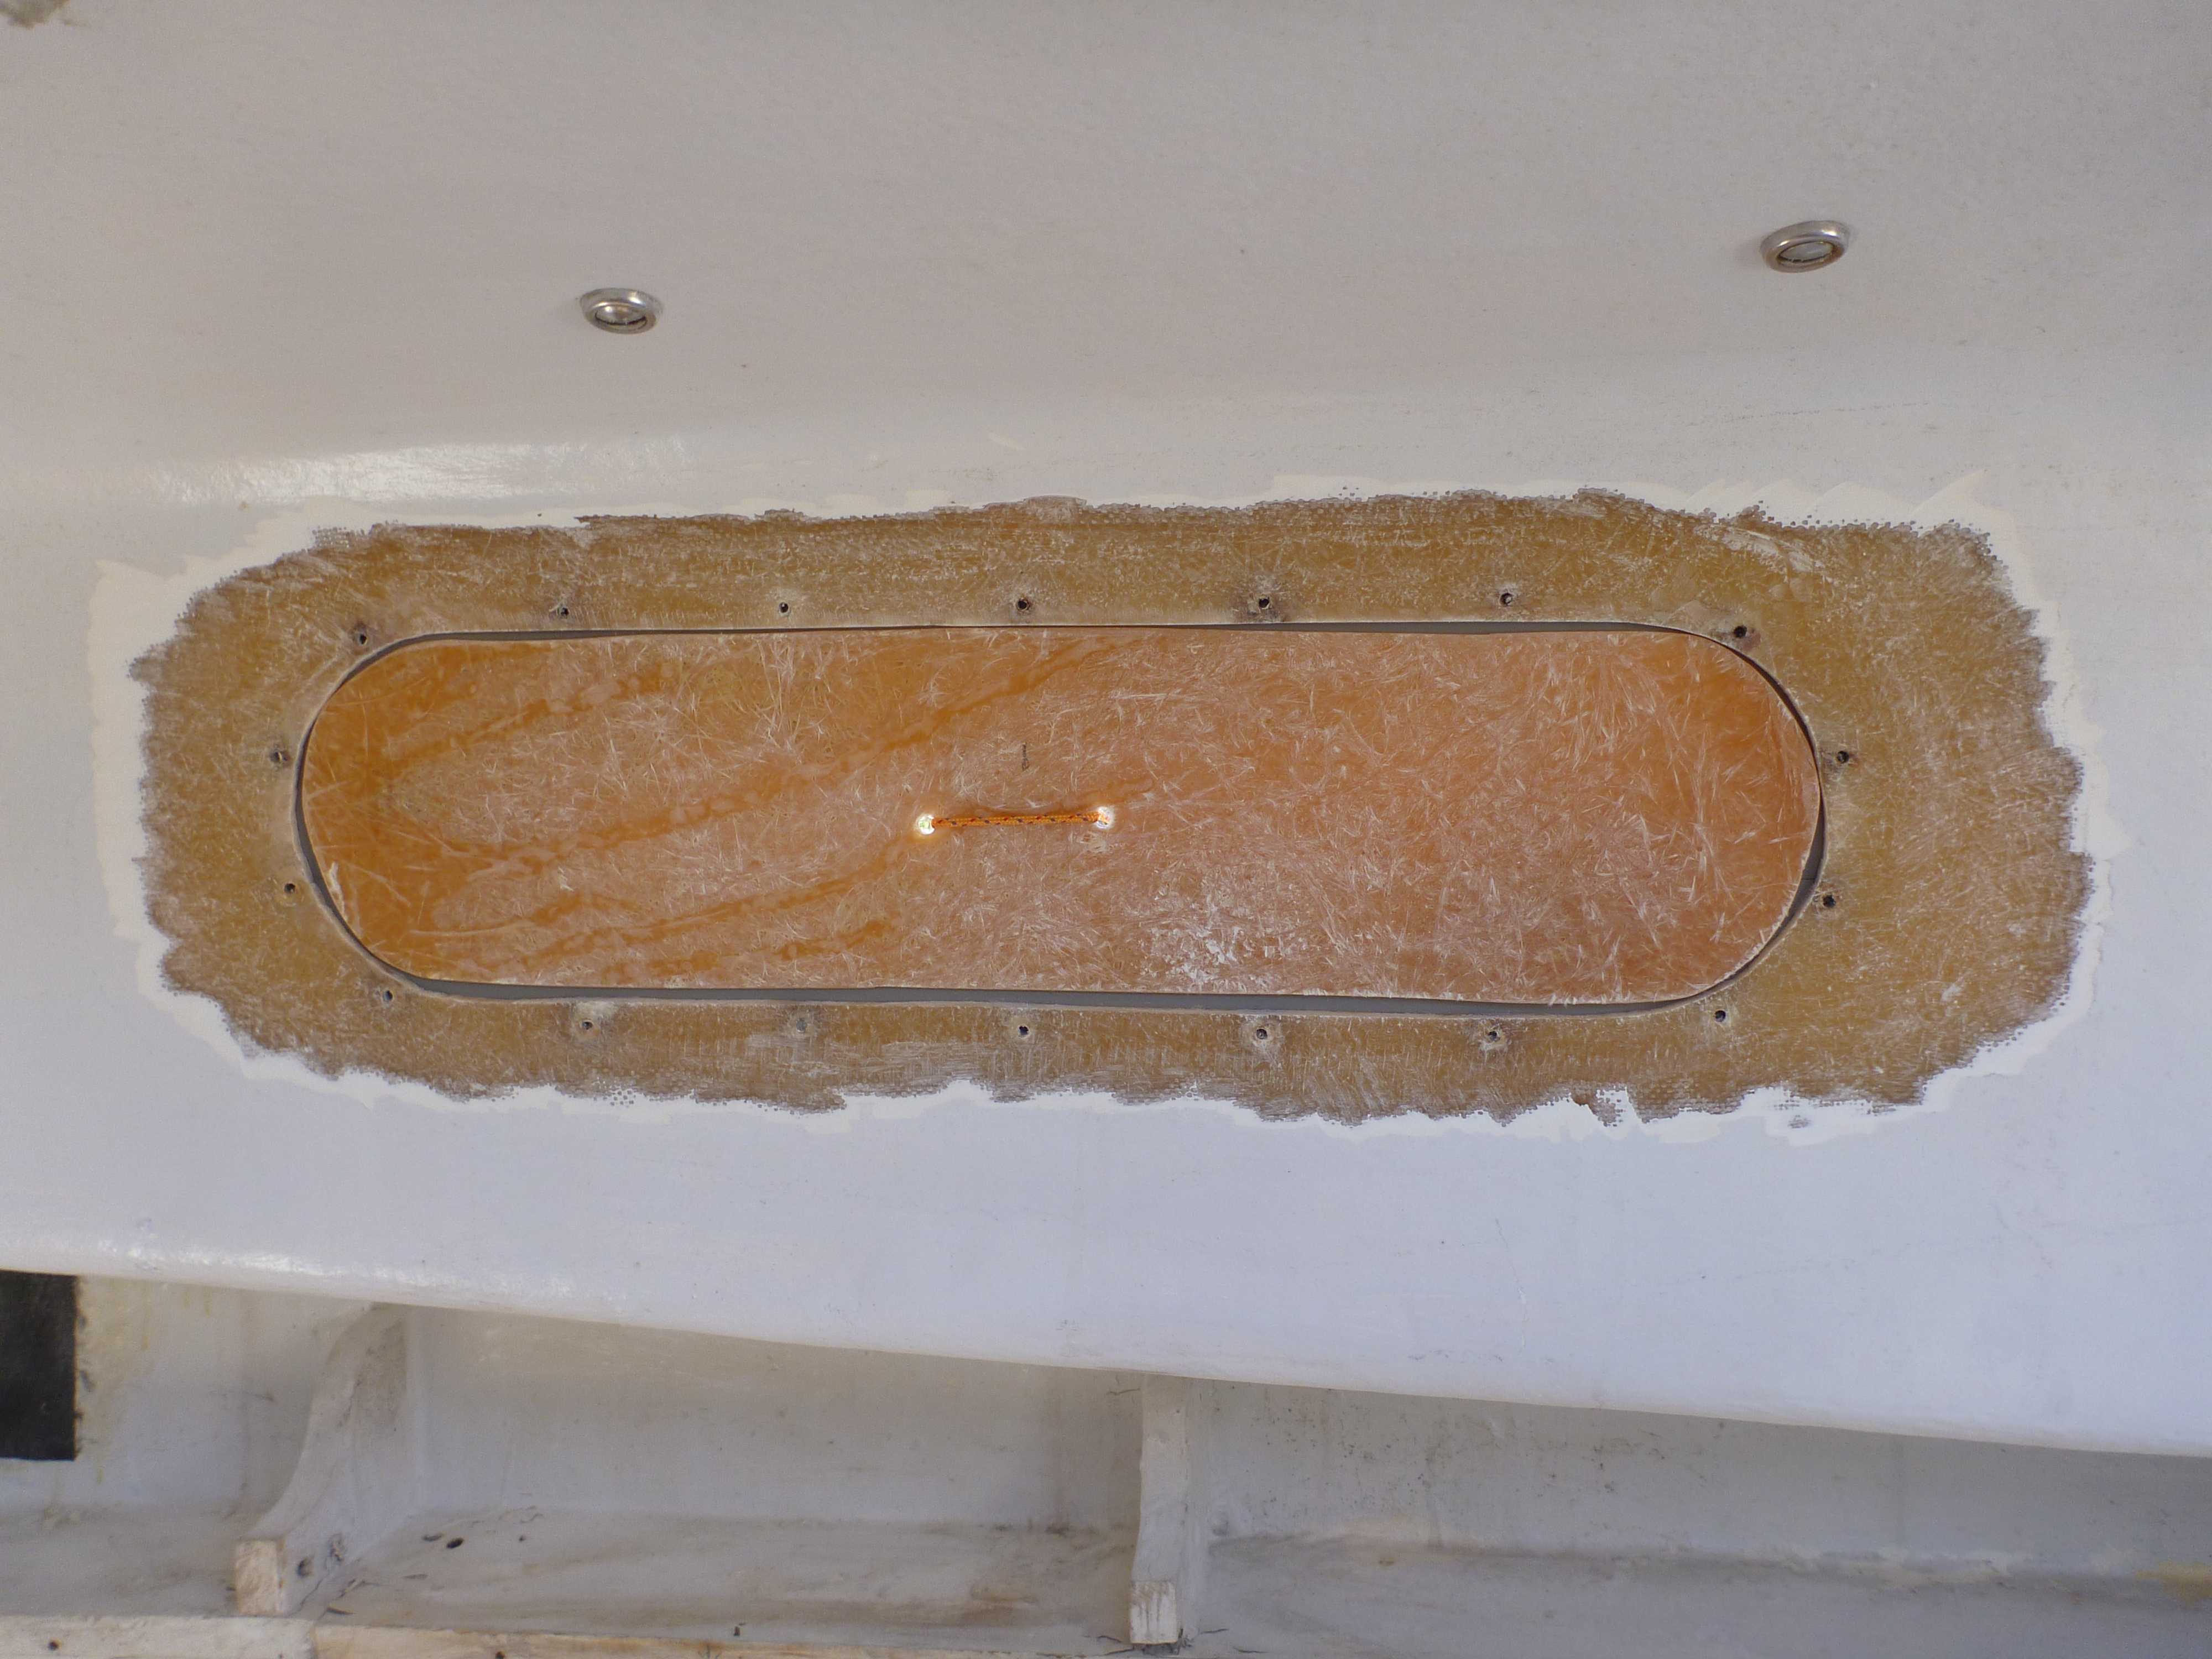
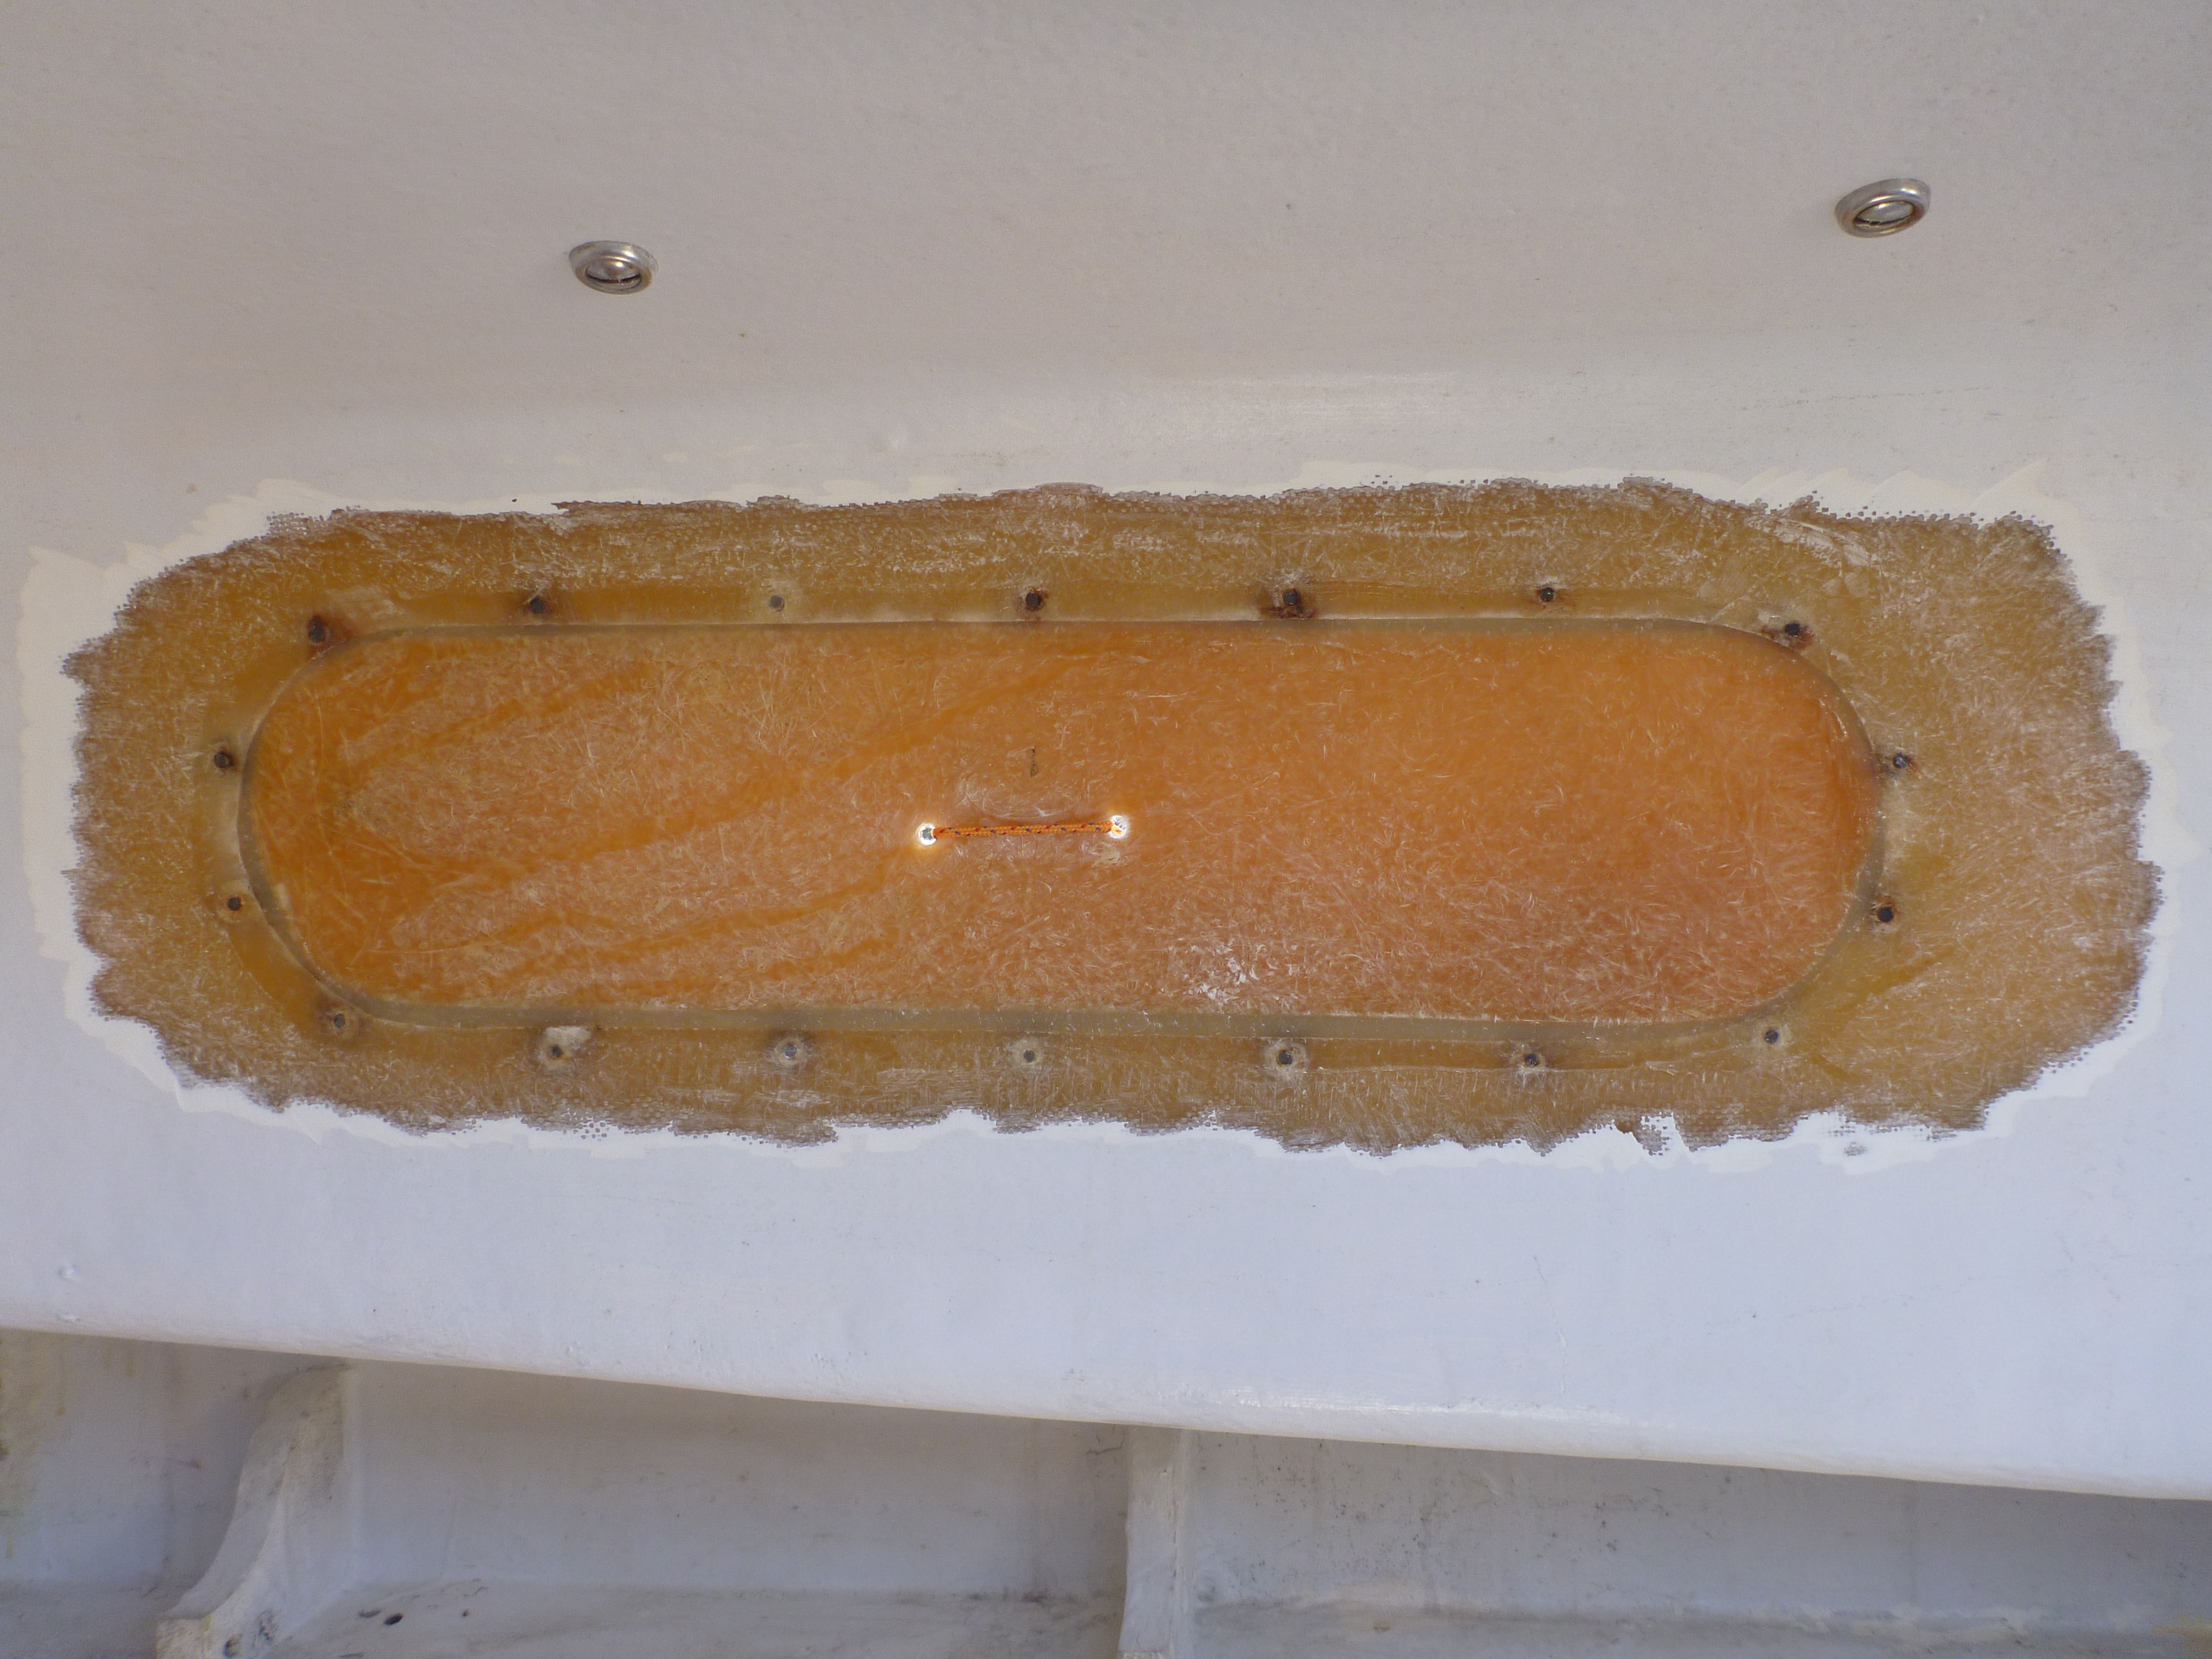
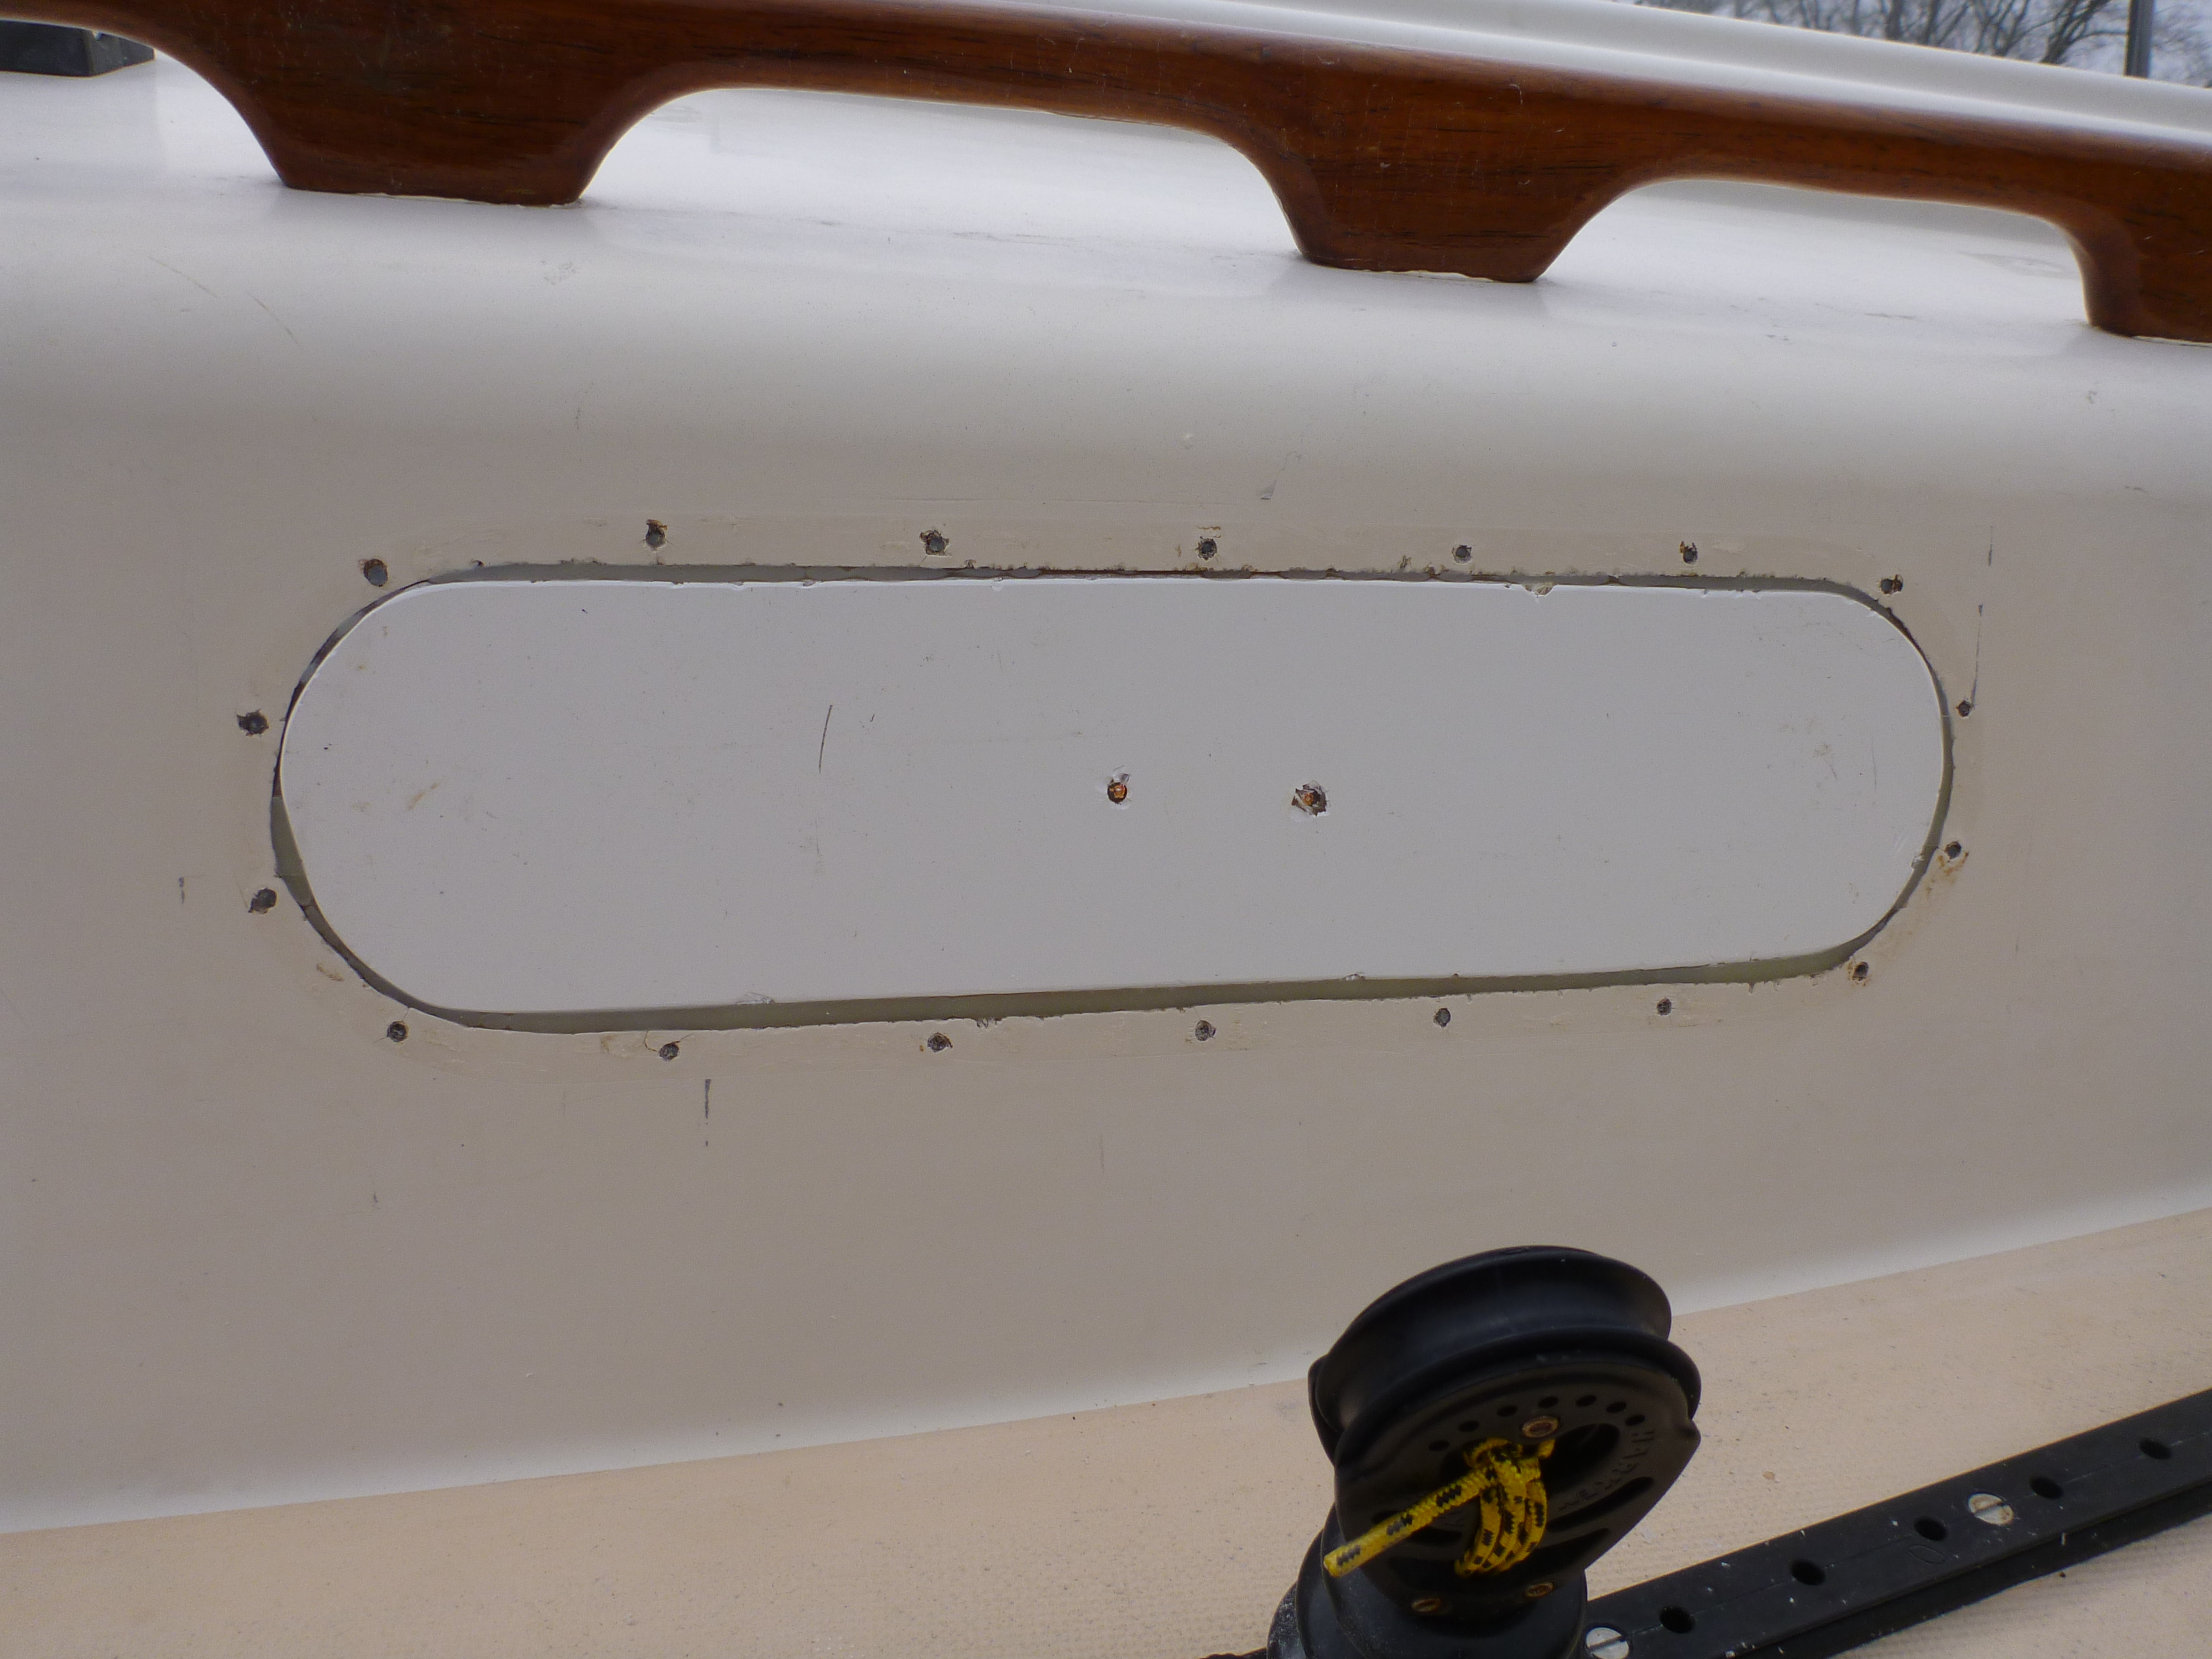
The next morning I removed all the tape and stuff from the outside. You can see from the picture that the fairing and finish work here will be minimal. I will finish this short of painting, and then cut the new apertures for the new ports.
For some reason I forgot to take pictures of the new apertures before installing the ports. I think I was too excited to get them installed. Cutting the apertures is very easy. First though, I recommend making a cardboard template of the port itself (complete profile) in order to test the positioning on the cabin side. You can tape the template, stand back and check the “look” and so on until you’re comfortable with the placement. I ended up centering the port both fore and aft and up and down, based on the cabin trunk.
I rented a cutting/drilling template from Newfound Metals, to facilitate cutting the apertures. I used this to mark out the cut line. To cut the new aperture after it is marked, I drilled a pilot hole inside the cut line, to accept the saw blade. I used a saber saw (some might call it a jig saw) and very carefully followed my cut line around. Note, in order to not mark up the cabin side from moving the saw around, I masked it with masking tape. After the apertures were cut I placed the drilling template back on the cabin side and clamped it in place, in order to drill the mounting holes.
One rather tricky part of the installation, has to do with cabin thickness. The Newfound Metals ports have a 1.5″ spigot. This is obviously designed for a much thicker cabin trunk. The trunk on my Sprite is probably about 5/16″ solid glass.
As previously mentioned, I ordered the teak spacers as well. These are nominally 3/4″ thick. I “dry assembled” a port, with spacer, to see how it would fit. I found that there was way too much spigot sticking out, and I needed more cabin thickness. The main body of the port has two “u” shaped drainage channels, and they are shaped in such a way that they reveal a “flat” on the bottom, if more than approx 1/4″ of spigot is exposed.
So I had to make up two more spacers (one for each port) to get to the desired 1/4″ spigot exposure. Using the teak spacers as templates, I cut two more spacers out of 1/4″ G10. I then used the drilling template to cut the inside line and drill out the mounting holes. Luckily, I had a lot of G10 on hand because I bought a huge piece from Jamestown Distributors in order to make a new centerboard for my Dyer Dhow dink. Otherwise I’m not sure what I would have used. These additional spacers did the trick.
NewFound provided me with bronze machine screws for installation, however they were too long. Dry assembling again I attempted to determine the optimal screw length, and then hacksawed a bunch of them down. Unfortunately I messed up and cut some of them too short. I ended up having to go to West marine to buy more. They did not have bronze, so I had to go with SS. They are metric, and quite expensive!
I can’t stress enough, while it may seem tedious, how important it is to perform a dry assembly to test out the fit before you load the ports with butyl. Plan on having a helper; there really is no way to do this job alone; you need one person outside and one inside.
Back at it, and with some extra washers just in case, and with my daughter helping me, I began the installation. I won’t review the instructions verbatim here, they can be found on Newfound’s web site and you receive a printed set with your ports. Basically, you wrap the spigots in butyl, mold the butyl around using your fingers, and then press the whole mess together with trim ring outside and port and spacers inside, and then screw it all together. It does take some time and the butyl gets really sticky and messy.
I ended up putting too much butyl on the first port that we did. We ended up pulling it and starting over with less butyl, and then obviously the second port went in without a problem! It is difficult to describe how much to use. We followed the directions, but had too much material to compress. All I can say is that you will know when you do it wrong!
When finished, you have to razor off all the butyl that squeezed out on the outside cabin side. You then use car wax to clean it up. When completely done, I used bronze polish to clean up the ports.
They look fantastic. I got alot of compliments on the boat after this project. Many of my friends could not place it, but commented on how good she looked. Here are some pictures.
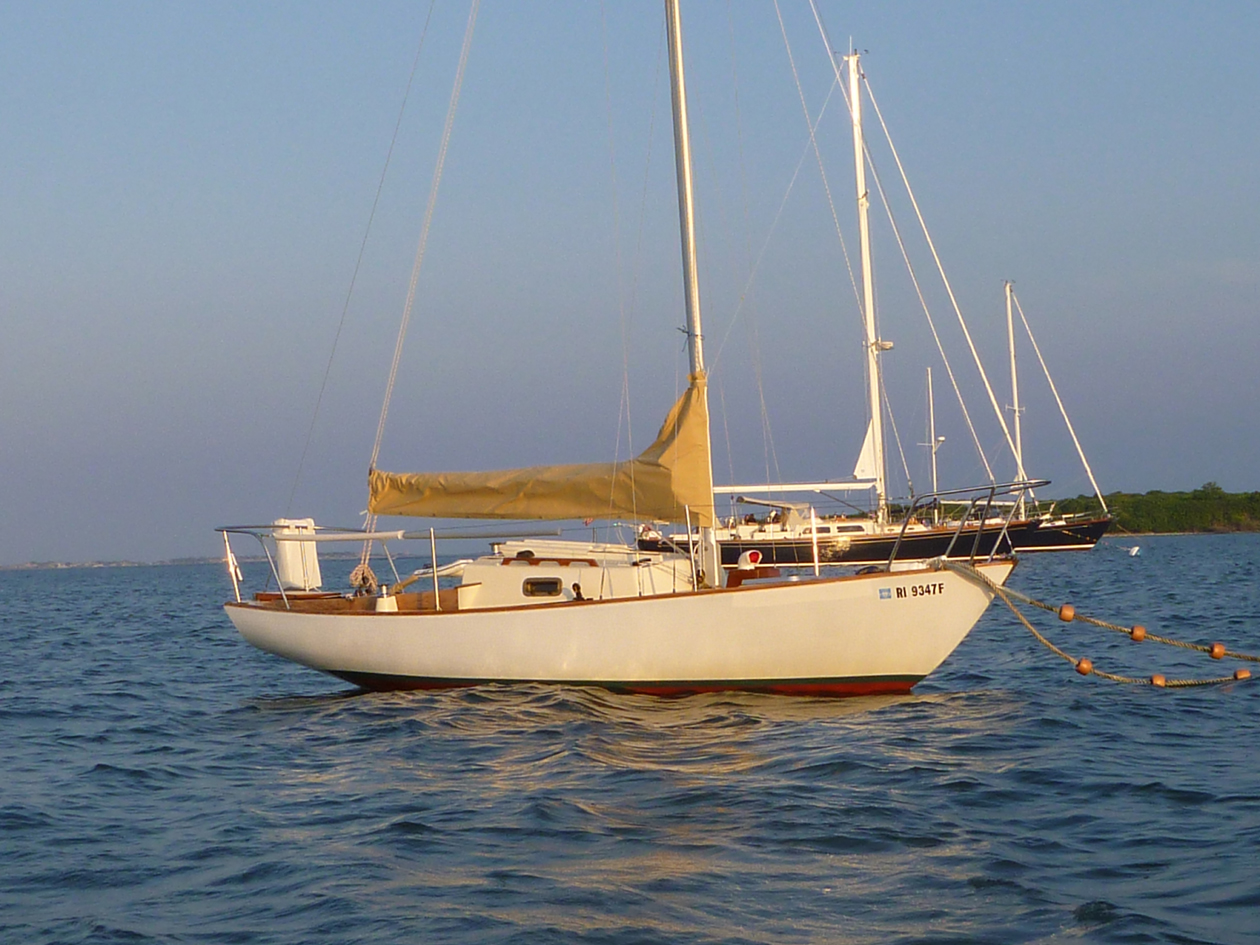
Here is a shot of the boat on her mooring, which gives you an idea of the overall “look:”
Here is a close up shot at the end of the season after haul out. They have a nice patina as the bronze has reacted to the salt (in the previous shot they are still shiny and new):

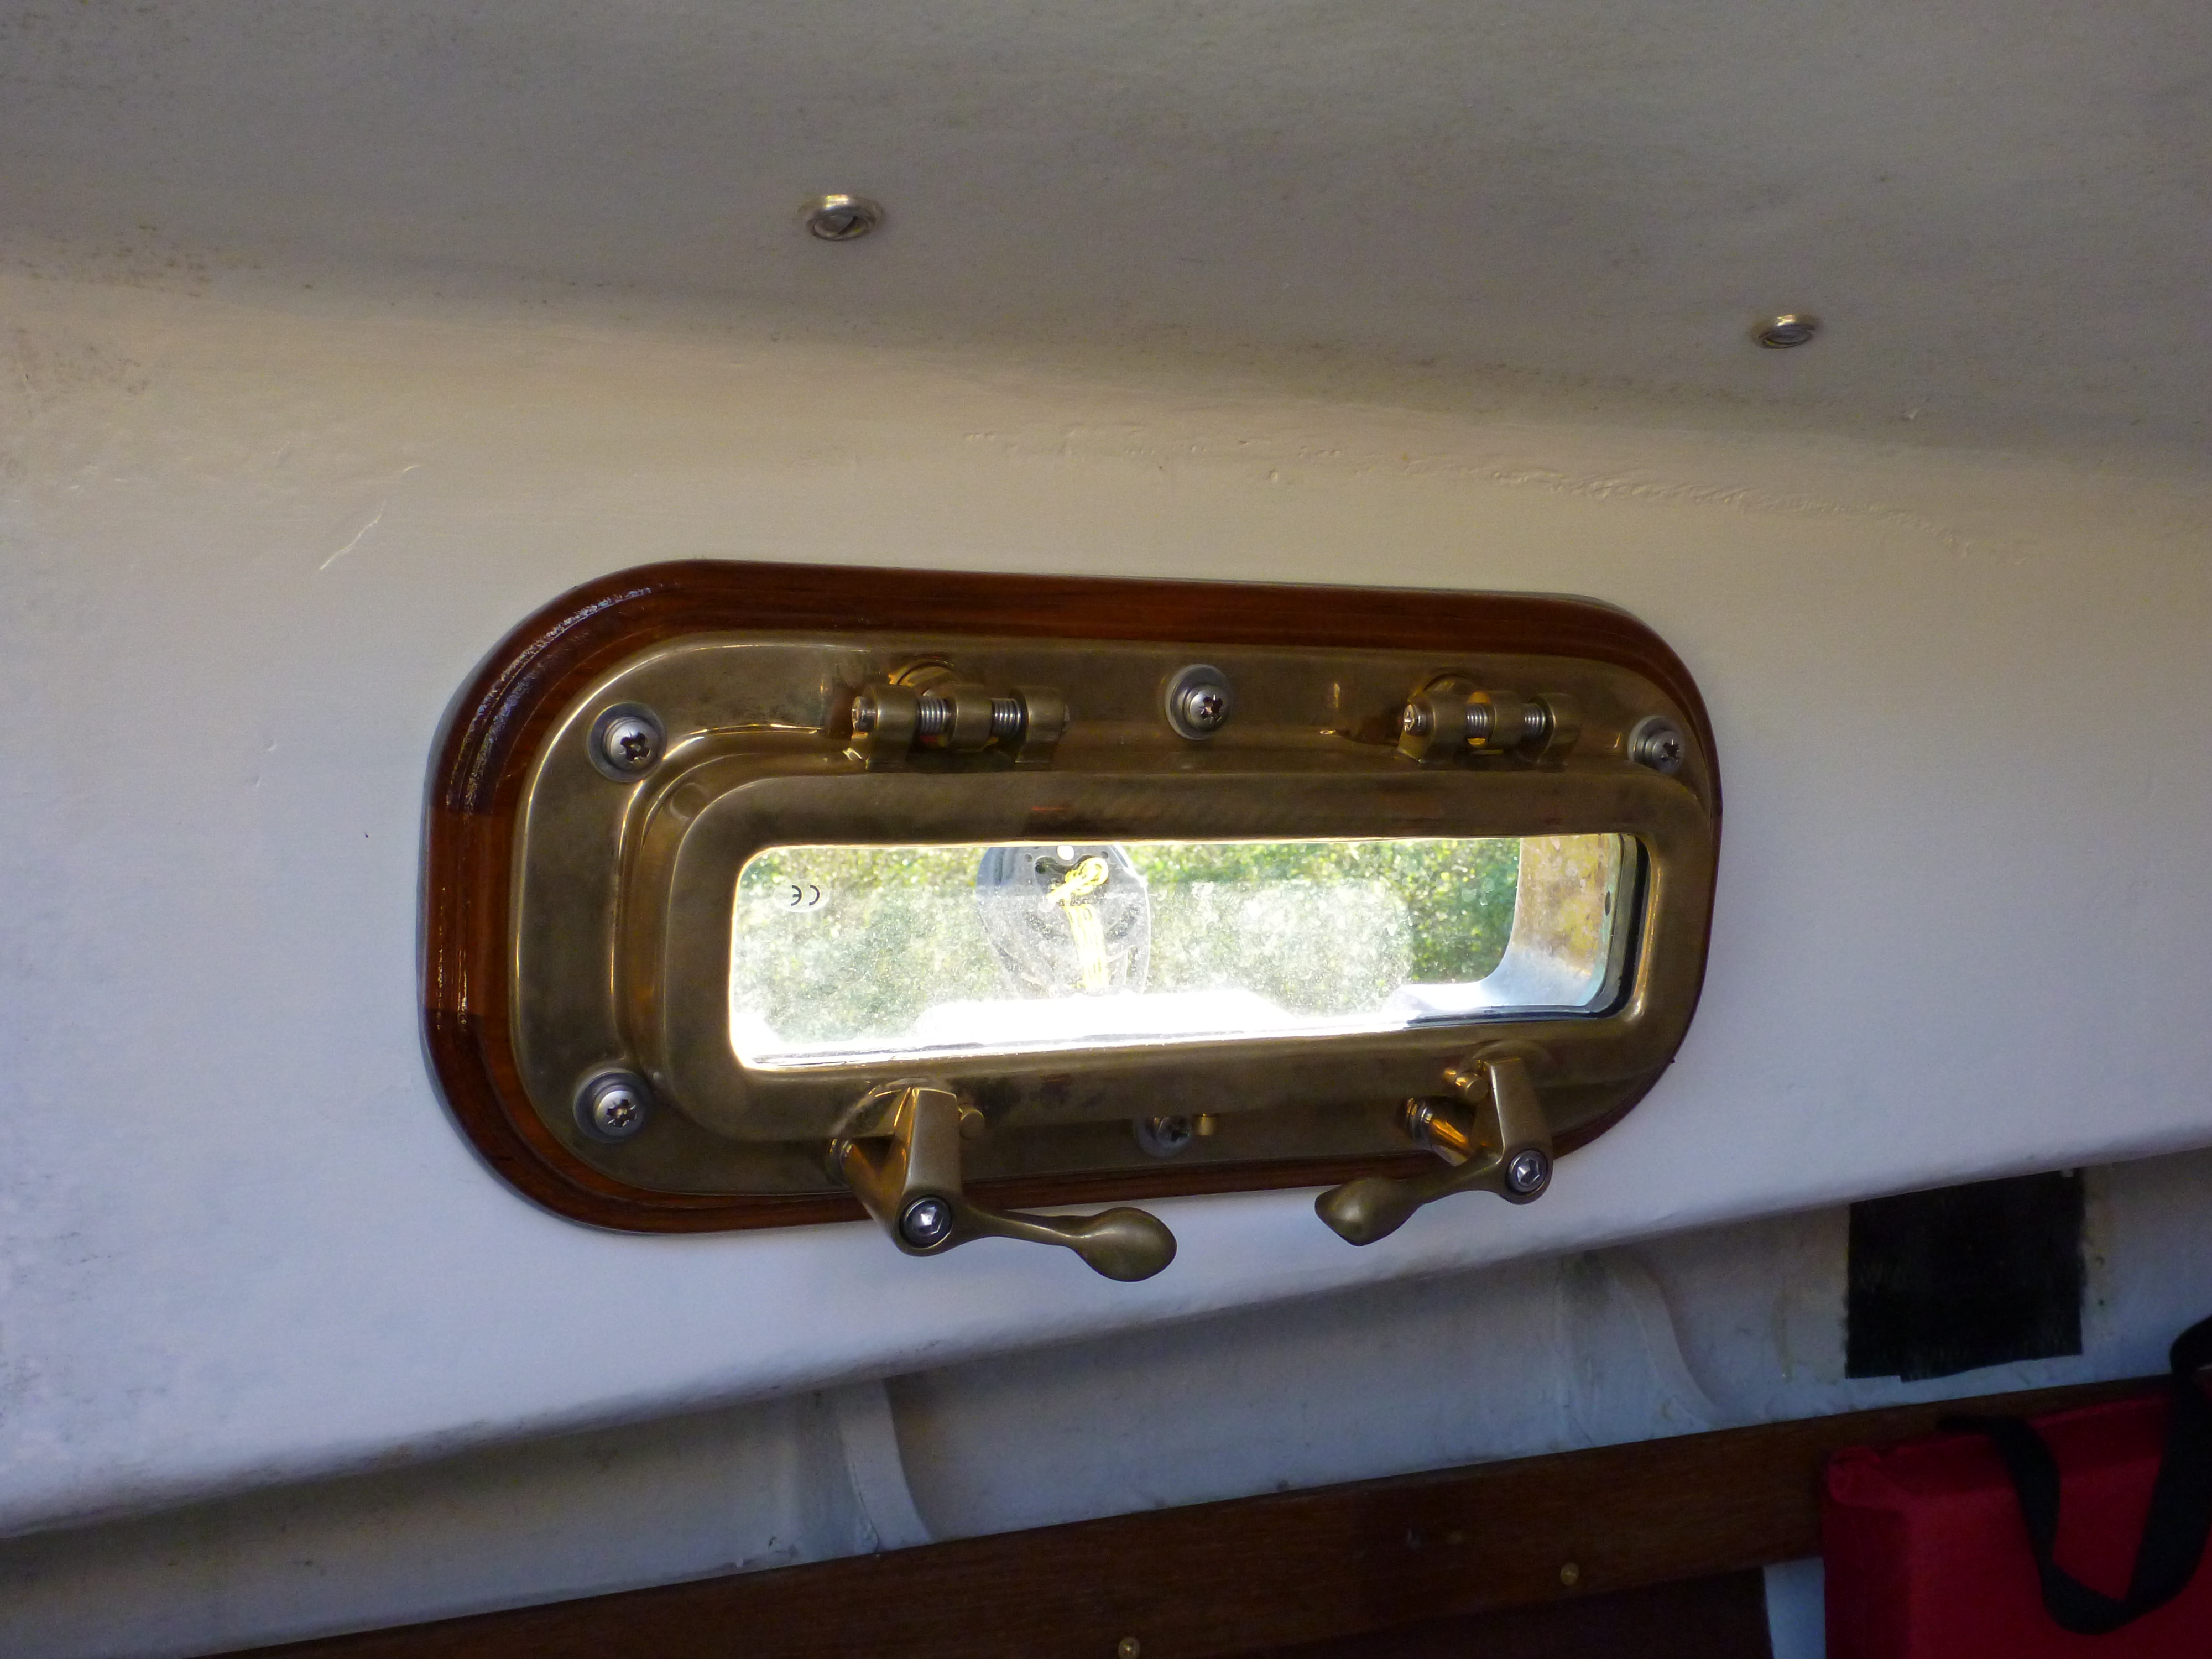
And finally here is a shot from inside the cabin. I varnished the teak spacers to make them stand out a bit. You really can’t see the G10 spacers, they are behind the teak spacers. There is obviously also fresh paint on the cabin side, spanning the area of the repair.
I am very happy with how this project turned out, and obviously they are dry as a bone! No more dripping!
Cheers
Dejan