Sea Sprite 23 Chain Plate Upgrade/Replacement Project – by Dejan Radeka
By now, the youngest SS 23 is just shy of being 30 years old. As discussed elsewhere in the forum, there are many structural components on these boats that are at or near failure and will require some sort of repair, replacement or upgrade in order for the boat to continue to be safe and functional.
The chainplates are probably the most stressed set of components within the rigging system, closely following the oft cursed deck support beams and sodden mast step area deck core issues.
Please note that this article assumes that you have already tackled deck core and mast support beam issues. All of these systems must be sound, and work in unison, in order for your rig to perform optimally and correctly.
Chainplate failure can manifest itself in the following ways:
- elongation and/or hardening of the clevis pin hole
- cracking near the hole or the body of the chainplate
- corrosion and failure (cracking or breaking) of the chainplate within the hidden section glassed into the hull
Before discussing the repair/replacement, it is important to first understand how they were installed during construction. The SS 23 chainplates are stainless steel flat bar that is bent into a “Z” shape. They were installed at the factory, before the deck layup to the hull. Each chainplate nestles into the inward turned hull flange (upon which the deck is laid). Picture that “Z” on its side. One leg of the Z is against the hull. The middle of the Z is against the hull flange. The other leg of the Z sticks up, with a hole in it (that is what you see above deck). The builder glassed the chainplate to the hull, and then eventually once the rest of the interior was ready, the deck was bonded to the hull.
To remove the old chainplates, one needs to grind away the old glass layup, to expose the chainplate. Then it can be pulled downwards, out of its slot in the deck and away from the hull. This is a very difficult and messy job, and the chainplates are very hard to reach underdeck, especially for those of you that are taller than average!
Replacement Options:
When I bought my 1974 Weekender in 2009 there were signs of chainplate deterioration. This included the early signs of rust streaks inside the cabin (from weepage of corrosion within the glass layup over the chainplates), and the early signs of clevis pin hole elongation. I knew I was in for the dreaded “chainplate project.” I rigged and sailed the boat carefully that season, and constantly inspected the system while I planned the replacement for the following season.
In my analysis of the scope of the problem, and in reading the many posts on the Sea Sprite Forum, I determined that there are three approaches to the replacement:
- Restoration; ie rebuild as new, with new components, using original builder’s approach.
- Replacement via modification to the original approach.
- Completely new approach ie going where no Spriter has gone before.
I quickly came to the conclusion that option 1 did not make much sense. Not only would it be difficult for me to fabricate new “Z” chainplates, but I would also just create the same problem for the boat in another 20 years.
Option 2 has been done a great number of times, and there are many posts on the Forum about how to go about this. This approach involves grinding out the old chainplates, fabricating blocks that are glassed to the hull, and then bolting new flat chainplates to the blocks.
Option 3 is my own approach. In this approach I engineered an entirely new solution utilizing deck mount bronze chainplates from Spartan Marine. If you are familiar with Cape Dory’s then you’ll be familiar with the end result.
For the remainder of this article I will provide more detail on Options 2 and 3.
Option 2 Detail: Replacement via modified approach
This is a very nice, and simple alternative to the original approach. It allows for easy future inspection and replacement of the chainplates, while retaining the original factory look above decks.
The figure below was provided to me by John Lemon during my numerous inquiries to various people that had done this repair before, and details the replacement. Similar work was performed and documented by Bly Hartley on her boat, and you can find her posts in the Forum.
Click to access Chainplate.pdf
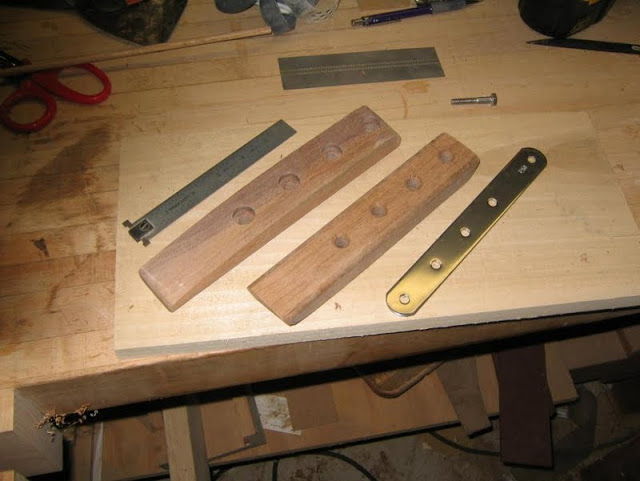
Here are some photos, provided by John Lemon and Bly Hartley:
The first photo shows the wood bearing blocks shaped and drilled, prior to installation. In this installation they used standard Schaeffer 316 stainless steel chainplates. This is a very simple approach, and affords easy replacement if ever needed.
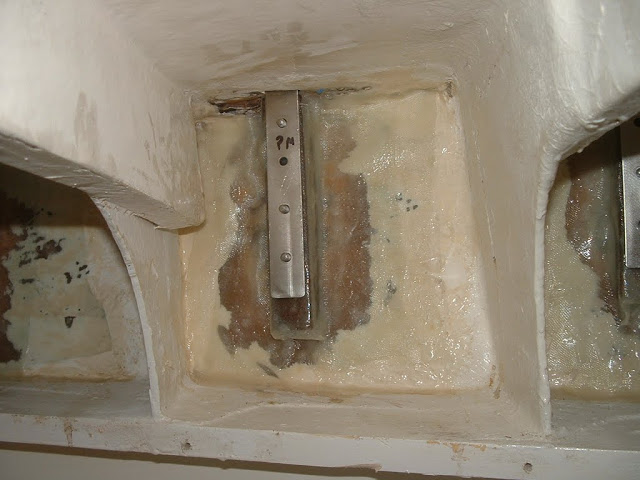
The second photo shows the initial fitting of a chainplate to a block that has been glassed to the hull. You need to relieve the deck slots just enough (you will caulk them later, once bolted in) to be able to slide the chainplate up through the deck at an angle to clear the bolts, then tilt the chainplate down over the bolts when the holes are aligned:
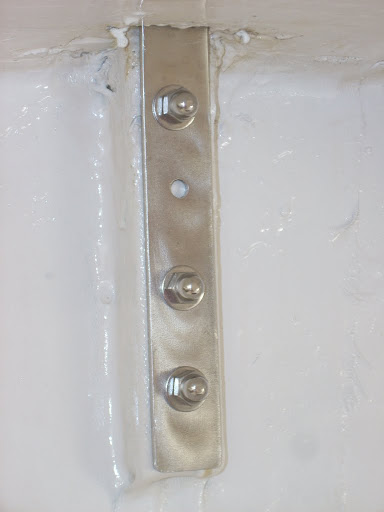
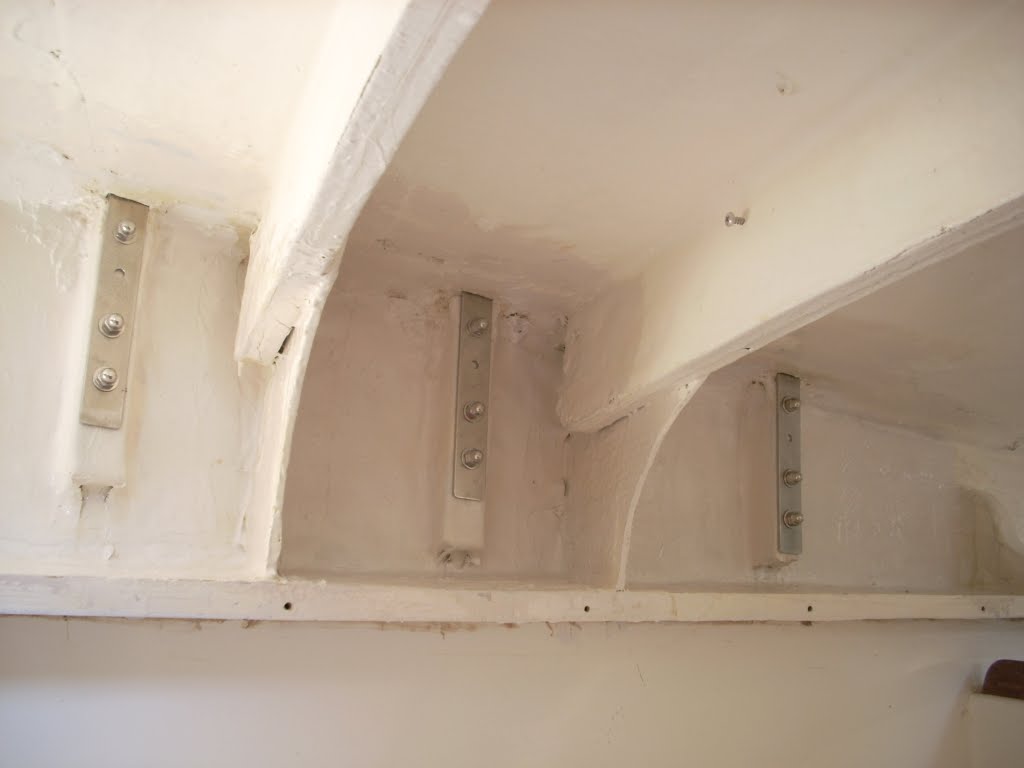
The third and fourth photos show the finished replacement job:
Option 3 Detail: Deck mount bronze chainplates
Why did I go this route? Well, my approach for refitting my boat has always been to improve all of the systems as much as possible. While I like Option 2, I was looking for improved form as well as function. I’ve had some experience sailing Cape Dory’s and I thought why not try to develop a solution using the deck mount bronze chainplates?
Rather than grinding out the old “Z” chainplates, I left them alone below deck and cut them off flush at deck level with a sawzsall. Then I ground them down just below the deck surface and glassed that over. I was re-doing the whole deck anyway, including new toerails, hardware, paint, etc so the glassing and deck painting was part of the overall deck project. If you are not redoing the deck, that is ok. The deck mount chainplates will obviously mount right over the old chainplate locations, hiding them. You just need to be careful with the cutting and grinding so as to minimize deck damage.
I ordered the Spartan Marine C182 chainplates, which are the 5/16″ chainplates with a rated breaking strength of 10,000 lbs. (The next one down is the C184, which is the 1/4″ rated at 2400 lbs) Don’t be tempted by the C184 because you have 1/4″ clevis pins. The issue here is that you need to exceed the rated breaking strength of the shroud, with the chainplate. The rated breaking strength of the 5/32 1×19 wire is 3300 lb. The load calculation that is used for rig design is 4/3 the breaking strength of the wire.
(To deal with the new pin hole size you will then need to add rigging toggles with 5/16″ pins to your turnbuckles. This should turn out fine, because the clearance dimension of the center pin height above deck for the Spartan chainplate is shorter than it was on the original SS chainplate. So even though the toggle will add some length, it will even out, unless your rigging was long to begin with and your turnbuckles were bottoming out when tuning.)
The cost of the Spartran C182’s (in 2010) was $18 each. For comparison purposes, I would have spent about $10 each for the appropriate sized stainless or bronze flat bar stock in order to fabricate my own new chainplates.
These old fiberglass boats were extremely overbuilt. The original builder’s “Z” chainplates essentially relied on the inward turned hull flange to take the rigging loads. My solution would rely a bit more on the deck taking the load. Therefore I needed to translate that load back to the hull flange.
I reinforced the hull/deck joint inside the boat, in the chainplate areas, with 3 layers of overlapping carbon fiber cloth, with a small fillet at the corner of the hull/deck, just to provide a little radius. Prep was simply grinding/sanding/acetone each area for a good bond. Note that this prep is far less effort and mess than grinding out the old chainplates. The old chainplates are buried in there somewhere under more glass, so who cares?
I positioned and drilled out holes for the chainplates. The chainplates are bedded with 3M 4200, through-bolted with 3/8″ FHMS, backed with G10 backing plates, washer and locknut. If you don’t have G10 you can make backing plates from aluminum or stainless plate. (You can get G10 from Jamestown Distributors, and stainless, aluminum and bronze pate from onlinemetals.com)
The deck in this area is already 1/2″ thick solid glass so with the carbon reinforcement this is probably way-overkill. Theoretically, based on the breaking strength of the components one could lift the entire boat from a single chainplate without even getting close to their maximum.
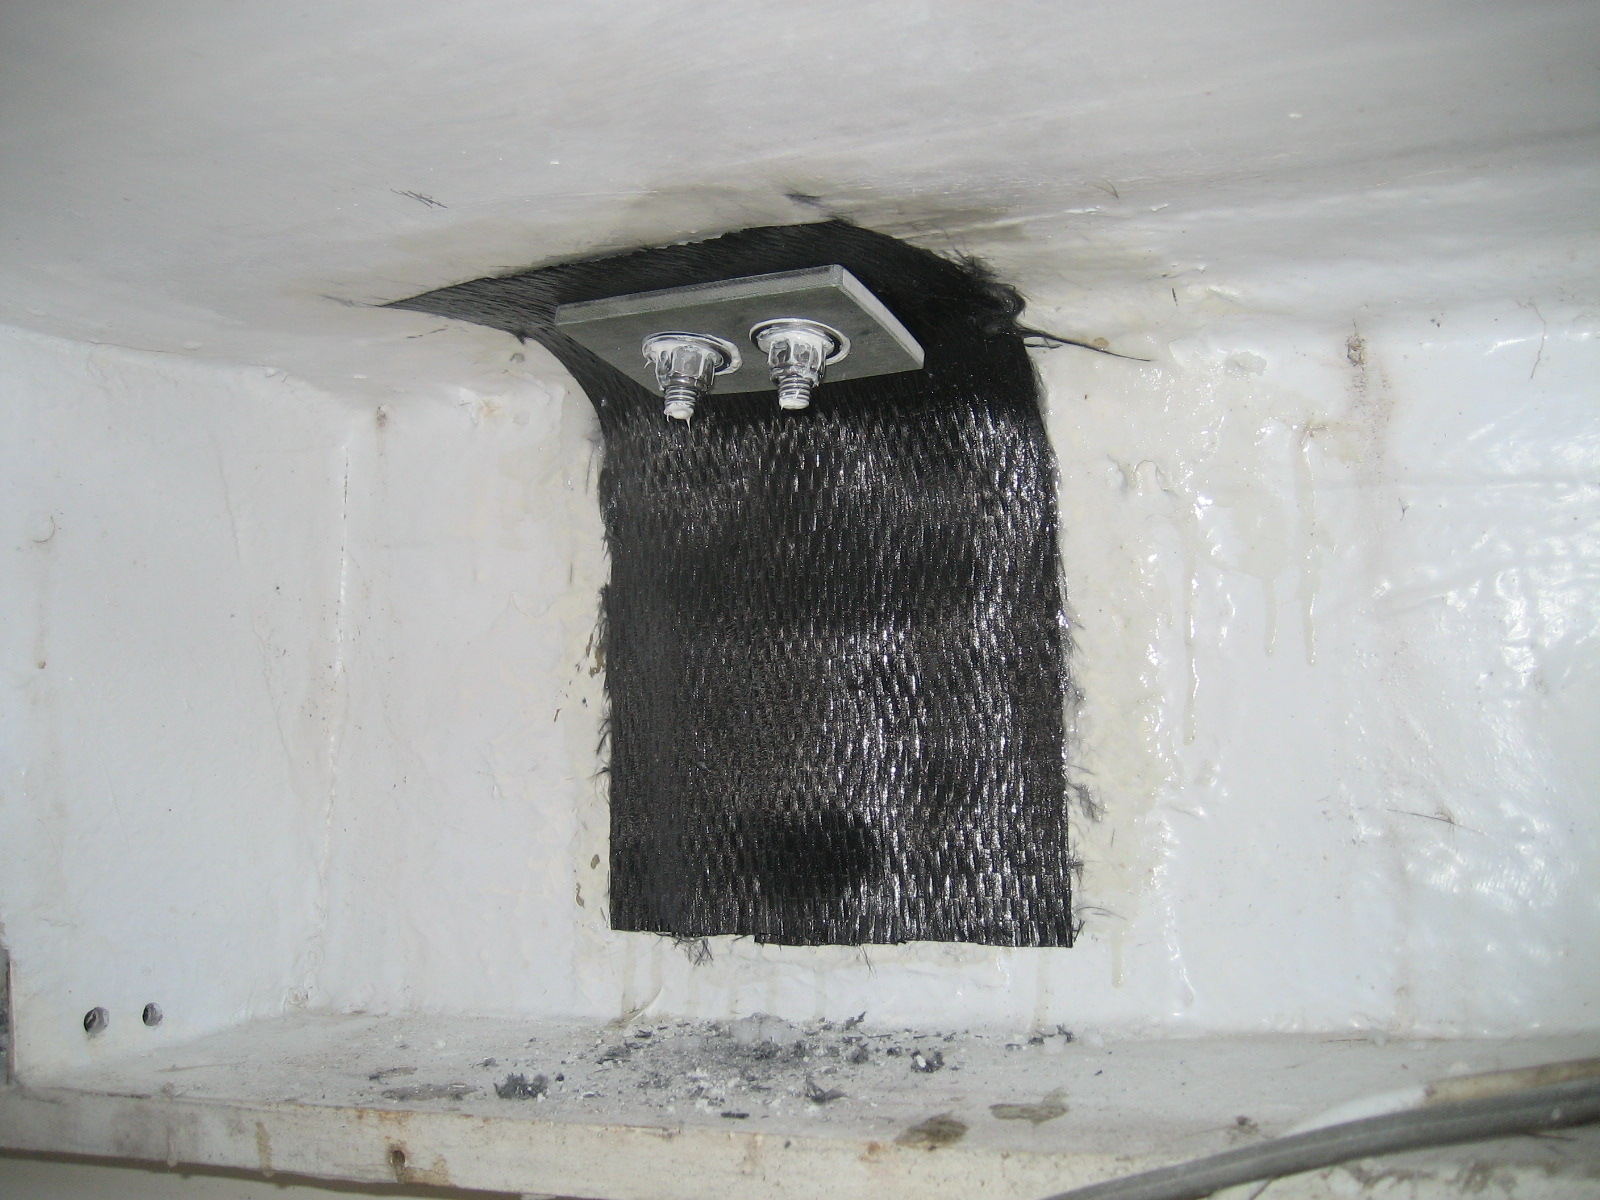
The first photo shows a close up of a carbon fiber reinforcement and the G10 backing plate on one of the chainplates:
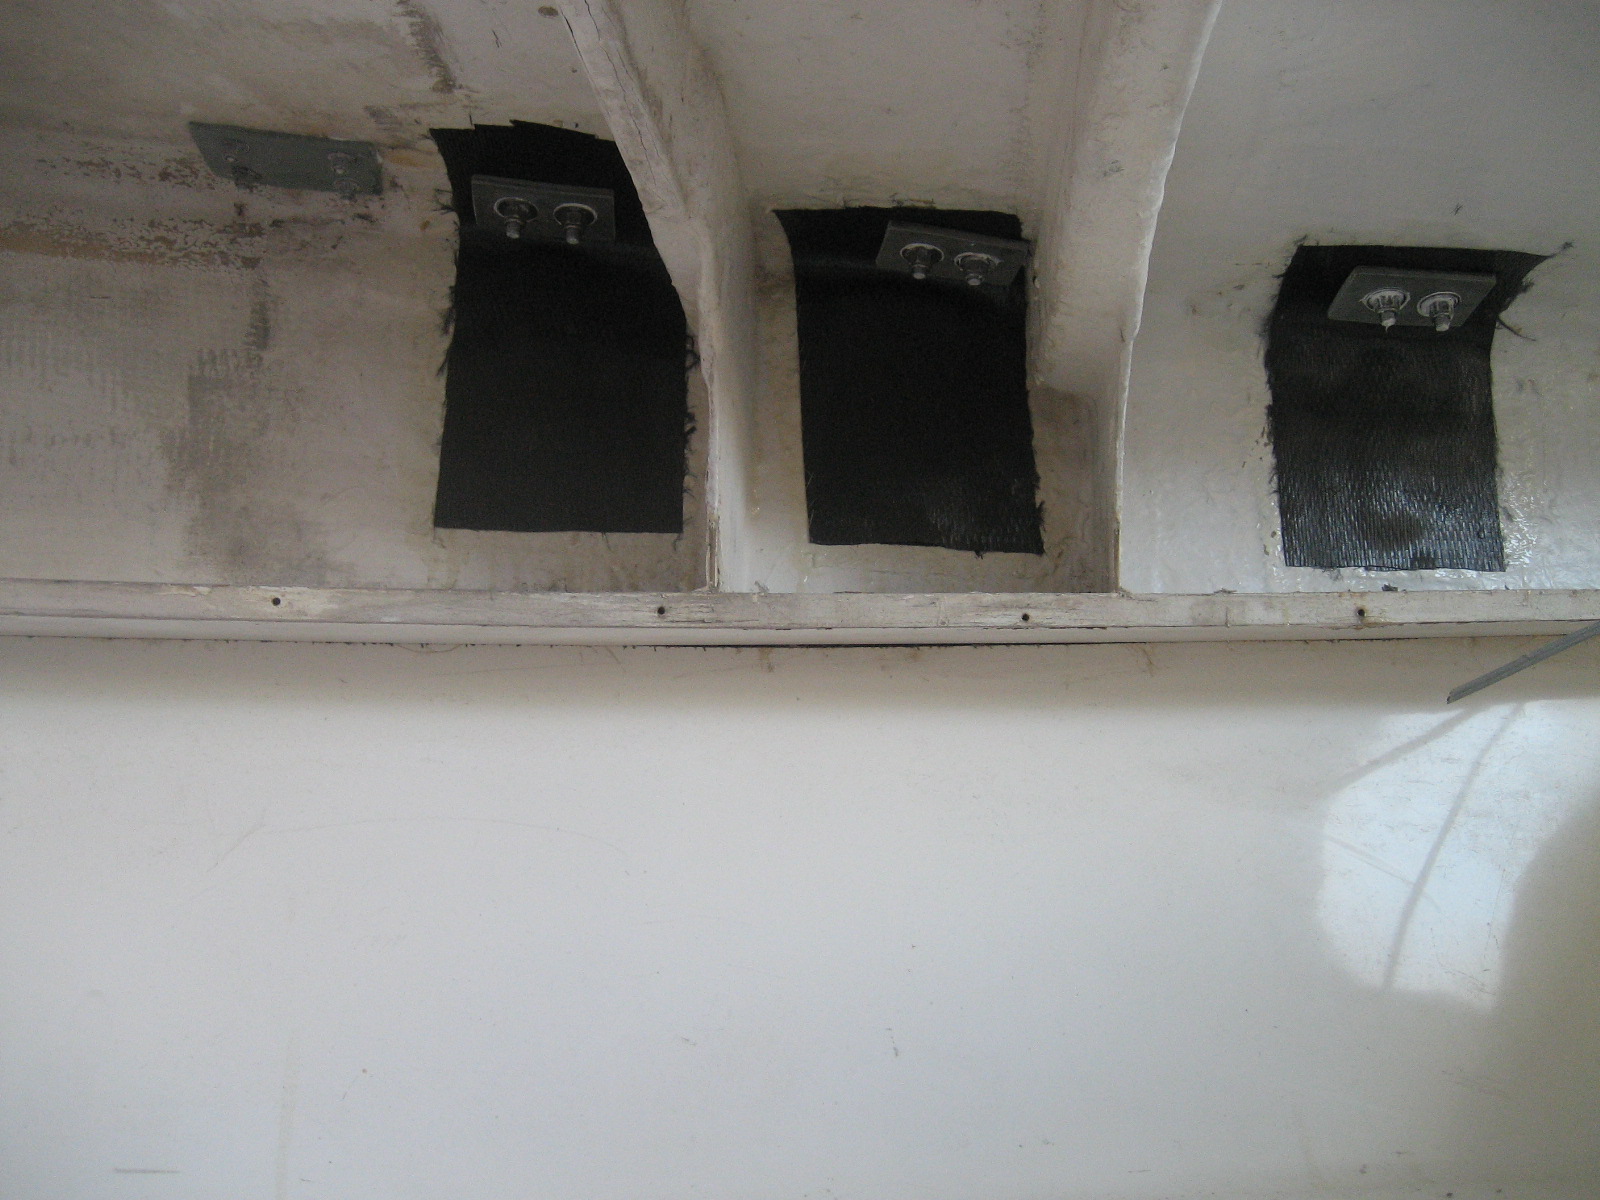
The second photo shows the starboard side below deck view of the reinforcements and installation. You can see that it was not possible to get the carbon cloth laid up on center at the middle chainplate location because of the deck support beam. (Over time I have found no issue here with stress):
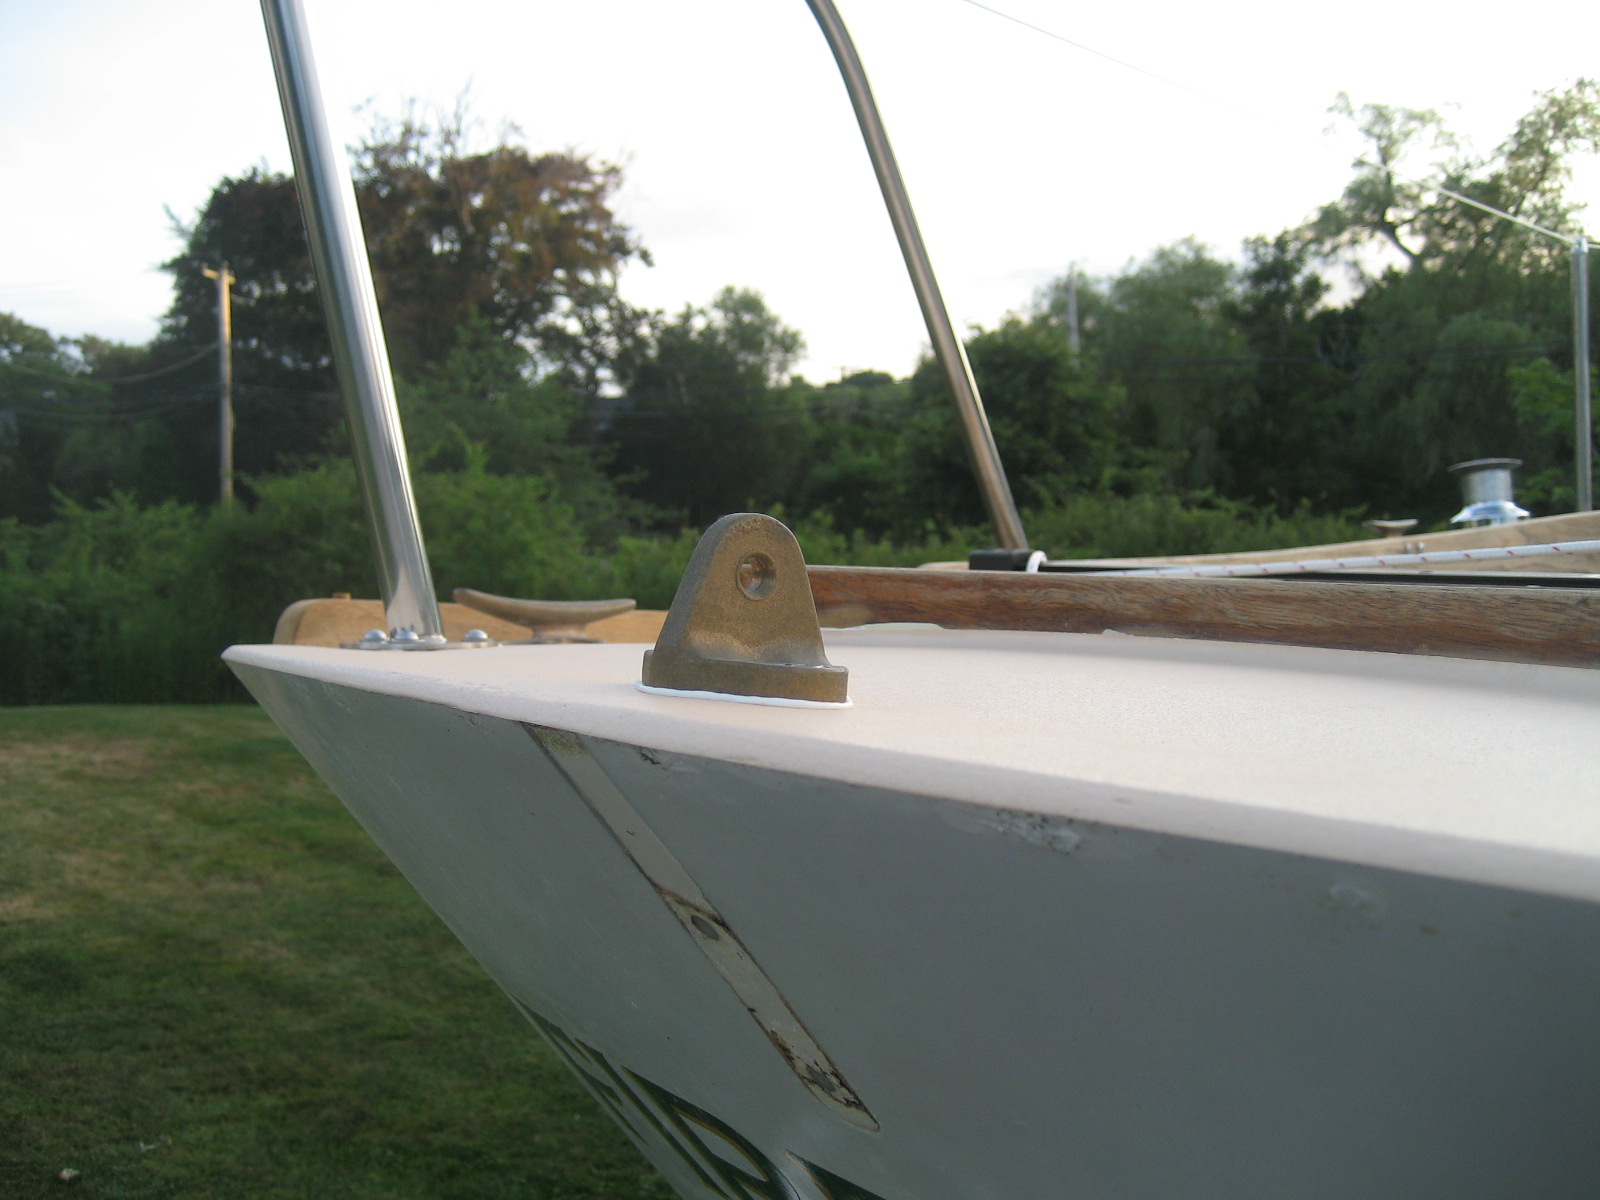
The third photo shows the above deck view. (Note this was shortly after all hardware installation on the freshly painted deck, with bungs still visible on the new toerails!)

As we all know, the back stay chainplate is bolted right to the transom. I think it is ugly, it forces one to place the boat name further down, and it typically streaks a rust stain down the middle. I also replaced this chainplate in a similar manner to the shroud chainplates, except I didn’t bother to reinforce the hull/deck joint. There was a 3/8″ thick fiberglass partition below deck, from the old motor well arrangement, that was off center just enough for me to place a G10 backing plate in there next to it, that bears right against the molded hull flange, that the deck is bonded to. There is plenty of beef in there for backstay loads.
The fourth photo shows the new back stay chainplate:
I am very pleased with this upgrade project. I can report that after five (5) full seasons of sailing, there is ZERO sign of any stress at the deck or hull for this installation.
I highly recommend this approach if you’re contemplating the chainplate project. Good luck!
-Dejan
You know, I was actually thinking of replacing the chain plates on my seasprite, but installing them outside of the hull old school wooden boat style. 1) for the looks, and 2) give a few more inches of breadth at the base for additional stability without increasing tension on the shrouds.
What do you think about that solution?