PAINTING YOUR SEA SPRITE…LET’S GET READY FOR SUMMER
Bob Rude – Sea Sprite 785 – Oasis
I’ve had a number of local sailors comment on how much they love the new paint job I have on my Sea Sprite. If you want to do the job yourself, here are some tips and lessons I learned from doing this during the spring of 2023. This post in its entirety can be found in “Technical” for posterity as well as here.
First, realize that this isn’t going to be as fancy as having a professional spray paint your boat with Awlgrip. But, it’s going to be about 95% as good and a heck of a lot cheaper. From 5-10 feet away, it’ll be hard to tell you didn’t have a professional spray job.
Here’s a list of the materials you’ll need to get started.
MATERIALS
An orbital disc sander with a built-in bag to gather the sanding dust (I used a 5” electric Rigid model from Home Depot – $65.00)
Packets of Diablo sanding discs having the following grits: 80, 100, 120, 150, 220). Buy the packets that have roughly 20 discs per packet. ($10.-$20 per packet)
Foam brushes – 1”, 2”, 3” width. Buy a box of each. Available online from Jamestown Distributors. Cost about $20 per box. Each box has approximately 20 brushes. Throw away after using. Good for varnishing, too).
6” foam rollers, pan, and handle for the roller. Only use foam rollers if you want a nice final finish! DO NOT USE KNAP ROLLERS! Home Depot or Jamestown Distributors.
Epiphane Polyurethane Top Side Paint (Two Part) – $70 per quart. You pick your color. You’ll need at least two quarts. (Defender Industries – Order on-line once you’ve checked out their color chart)
Epiphane Two Part Semi-gloss polyurethane primer. Choose white or grey, depending upon your boat’s final color. Two quarts at around $50 per quart. Defender Industries
Ephiphane Brush Thinner – $20.00. Defender Industries.
Lots of lint-free rags
Flexible sandpaper blocks of various grits – Home Depot
Tyveck suits and a good respirator. Clear eye protection is also a good idea.
Plastic mixing pots for mixing the two-part paints – Jamestown Distributors. Price varies by size. Sold in packs of 5.
Now that you have all your materials, you’re ready to get into it. You’re going to develop some new muscles from holding the sander against the hull. Be patient.
I would recommend beginning the sanding on the stern of the boat. Start out with the 80 grit sandpaper. Starting at the stern will give you a good idea of how you’ll need to transition through the different grits of sandpaper to eventually end up using the 220 grit. Also, if you make a mistake on the reverse transom, it won’t be as visible as if you’ve done it at the bow of the boat. Think of the transom as your “practice area.”
Your first pass of the hull with the 80 grit will knock down some of the high spots and maybe eliminate some of the scratches and dings you’ve incurred over the past few seasons.
The project begins…The original green gelcoat that had been painted over with a cheap one-part green paint. This photo was taken after the first sanding with 80 grit sandpaper.
Don’t be surprised if your hull looks “splotchy.” Notice how one of the photographs of my early sanding appears. The hull looks like a pinto animal. You may need to use a fairing compound if you have some big dings. You can hose your boat down with a garden hose to remove some of the dust collected from the sanding.

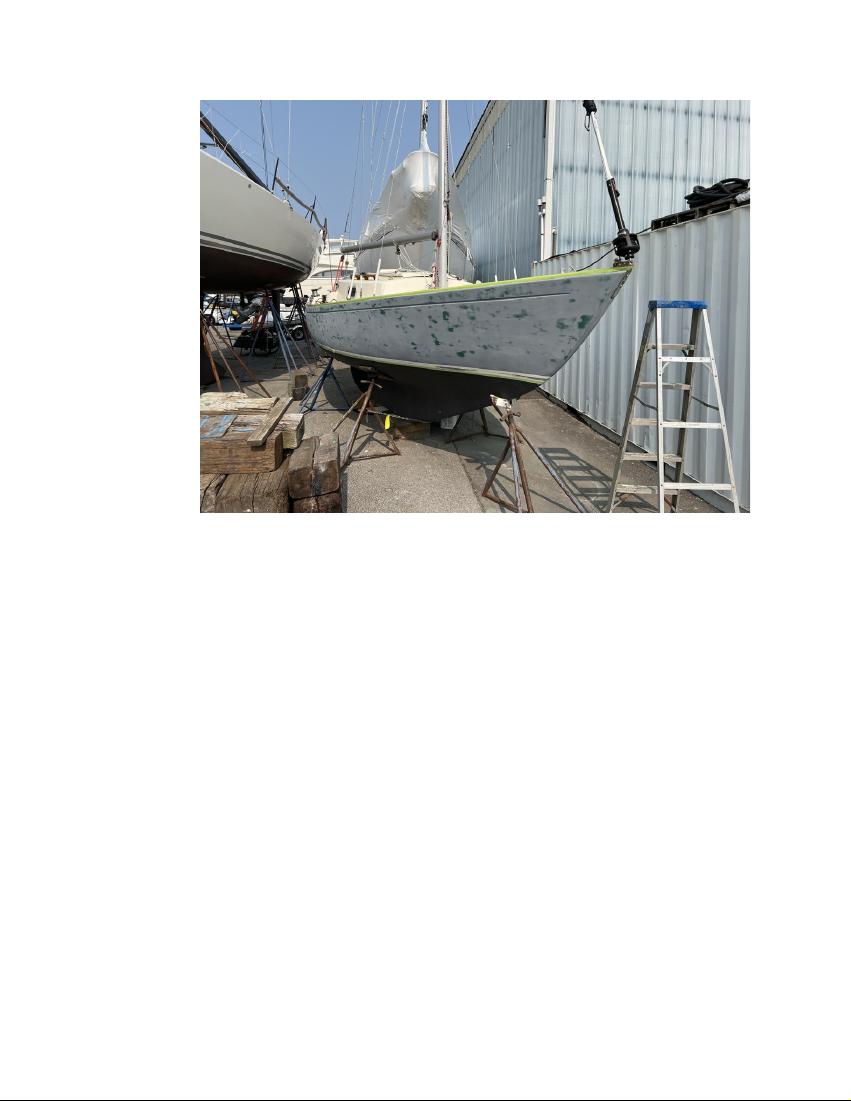
The old paint as been completely sanded off using each of the sandpaper grits. This is what the hull looks like. Notice there are still some minor hull irregularities probably caused by original hull mold. Try to get the hull faired as smooth as possible
I hope you’re not exhausted from these repeated sandings. You’ve only accomplished the first step in getting the hull prepped for the primer. From this point on, you want to repeat the sanding with successive finer grit sandpaper. Don’t be afraid to change the sandpaper as you go along. Let the newly affixed pad do the work of leveling the hull. After completely doing the hull with all the different grades, you’ll be ready to think about painting.
At this point, you should mix a solution of 75% water and 25 % alcohol in a bucket of water. Using a wet rag, wring the water from the rag and gently wipe the hull down, wringing the rag out frequently will remove any dust and impurities that may have occurred.
While you can sand the boat in sunlight or shade, when it comes time to paint, you need to be careful not to apply primer or paint in direct sunlight during the heat of the day. It’s better to paint when the hull is in the shade or earlier in the day. If that means you’ll only be able to do half of the hull, so be it. The worst case scenario is trying to roll on primer or paint on a hot hull. The paint will dry as soon as you touch the roller to the fiberglass and it will inhibit the slow drying of the paint that you need in order to get the paint to level out and create a smooth surface and a nice shine.
I’ve included a photo of my primed hull. You’ll need to put two coats of primer on with a 220 grit sanding between coats. Again, wipe the hull with the water/alcohol mixture. Primer comes in two colors. Use gray primer for darker final colored paint or white primer for lighter colored paints. Allow the primer to dry thoroughly and then do a final 220 grit sanding and clean up. You’re getting closer to apply the paint! Finally.
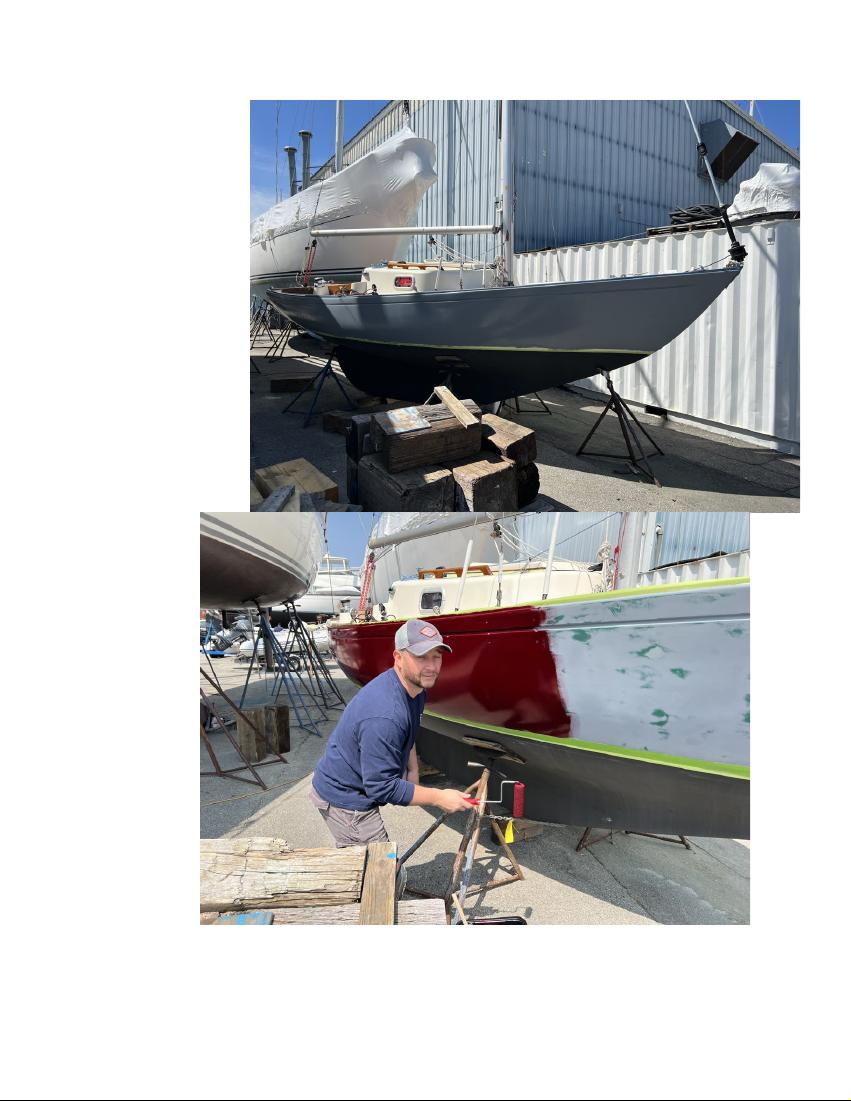
Once the second coat of primer has dried and been sanded, wipe it down and get ready for the first of two coats of paint. Let the hull dry for a day or two. Here are some additional tips. I needed plenty of tips. My painting coach is shown above giving me some pointers.
I suggest you start the painting by experimenting with your rolling skills by first painting the underside of the transom down near the rudder post. You are bound to make a few rookie mistakes with the roller. Make those mistakes out of sight.
I’ve seen so many sailors get jacked about putting the final touches on their boat by painting the bow sections first. Invariably, they glop the paint on too thick and the finished product has roller marks or runny paint right where you don’t want anyone to see it…on the bow. Be patient. Attack under the stern first. You’ll be glad you did. If you feel really frisky, you might move to the transom as your second painting endeavor. Once you’ve master the art of using the roller with a light touch, you can move on to the port/starboard sides of the boat. This photo shows my professional painting coach giving me a lesson.
There’s a real knack to using a roller. Always roll from a point of existing paint to the section that hasn’t been painted. As you finish the rolling stroke, use a flick of the wrist to get the roller to leave the hull with a light touch.
Someone may tell you to use a paintbrush to “tip” the paint. I’ve painted two boats without tipping and the boats turned out beautiful. I’ve never had success with tipping. You choose your poison. For me, I’m sticking with the foam roller…no brushing.
There may be sections of you boat where you will want to use a foam brush for detail work. You may decide to mask off the toe rail before priming or painting. If so, take one of the narrow foam brushes and use it for edging. Then run the foam roller up to the section you’ve just painted. Do the edging as the same pace you are rolling. That way the paint can blend in while it’s still wet.
Once your hull has the first coat of paint, use the 220 grit sandpaper and gently go over the dried painted hull. By now you should be a master sander. Wipe the hull down with the water/alcohol mixture and let it thoroughly dry. Then roll on the final coat of paint. If you’ve done all the prep work, you should have a bright smooth hull.
In retrospect, I would estimate that 90% of the work is the prepping the hull for the final two coats of paint. It will be hard to persevere through all the sanding but this is all the foundation for ending up with a beautiful boat. Take your time. You’ll be happy with the end result. Don’t rush and make a mess out of a beautiful Alberg-designed day sailor.
Here are some photos of the final project. I’ve added a gold-leaf cove strip to set off the deep read color of the hull. I’ve applied two coats of the Epiphane Dark Red two-part polyurethane topside paint.
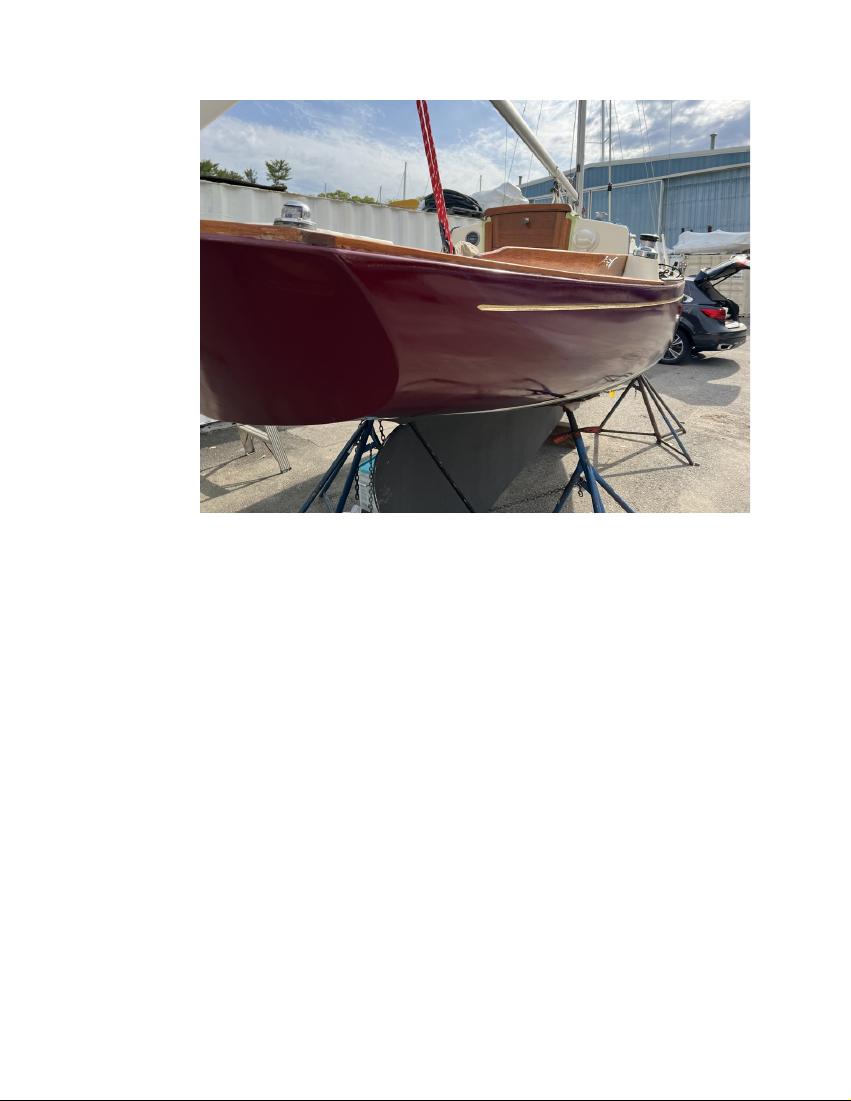

A second coat of black Interlux CSC bottom paint is still needed. I also ended up painting a new waterline with Epiphanes water line paint. This can be painted on with a foam brush.
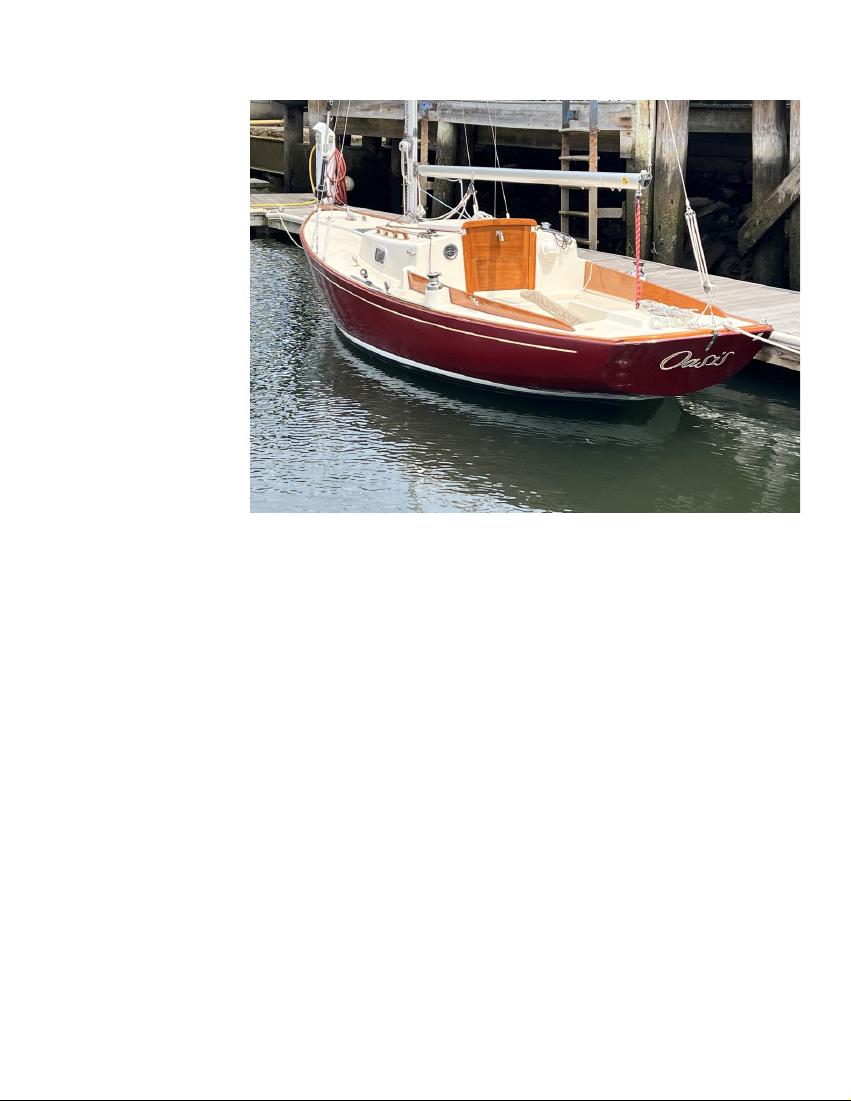
The finished product is in the water and ready to go. I had a professional come and apply the gold leaf name on the transom.
Good luck to you as you restore your Sea Sprite. All the time and effort will be worth it.Edit